
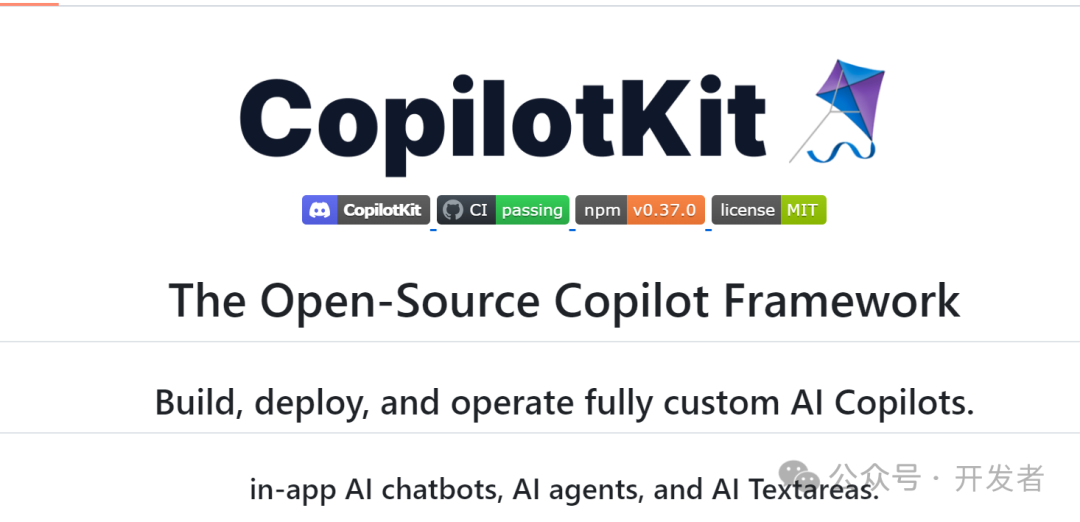
CopilotKit ,7.2K+ 开源框架,帮助开发者在应用中轻松集成 AI 功能
背景:随着人工智能技术的迅猛发展,需要在各种应用中快速集成智能对话代理来增强用户体验。CopilotKit 应运而生,提供了一套完整的解决方案,帮助开发者在任何应用中轻松集成 AI 功能,解决了应用开发中的智能化难题。目标:主要目标是提供一个易于集成的框架,使开发者能够在其应用中快速部署和运行定制的 AI Copilot,提高应用的互动性和智能性。主要功能:核心功能包括在应用中集成 AI 聊天机器
项目概述
-
背景:随着人工智能技术的迅猛发展,需要在各种应用中快速集成智能对话代理来增强用户体验。CopilotKit 应运而生,提供了一套完整的解决方案,帮助开发者在任何应用中轻松集成 AI 功能,解决了应用开发中的智能化难题。
-
目标:主要目标是提供一个易于集成的框架,使开发者能够在其应用中快速部署和运行定制的 AI Copilot,提高应用的互动性和智能性。
-
主要功能:核心功能包括在应用中集成 AI 聊天机器人、AI 代理和 AI 文本区域,支持应用状态感知和与第三方服务的交互。
组件
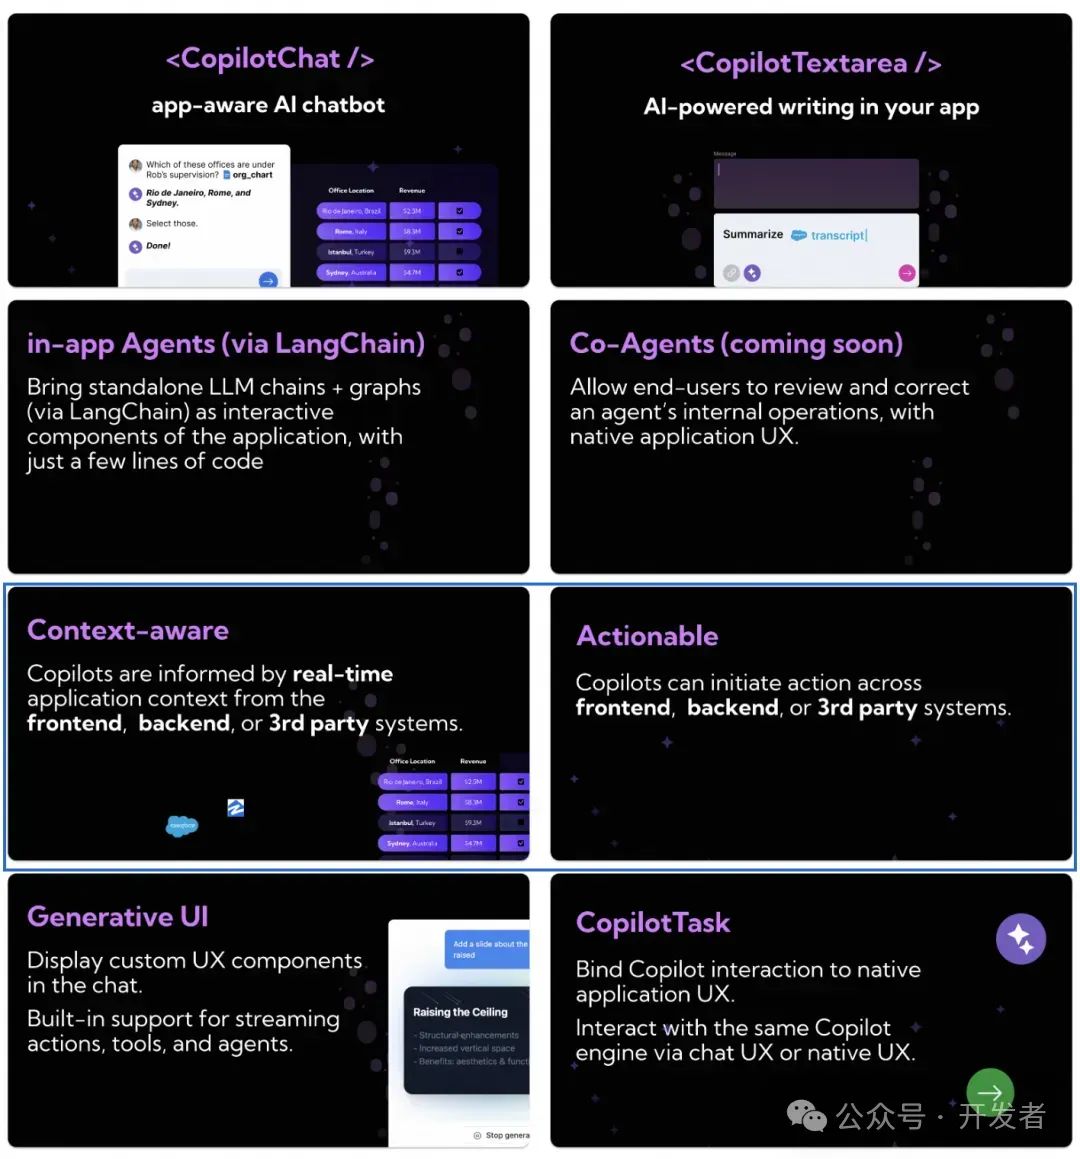
🌟 <CopilotChat />
构建对应用状态感知的 AI 聊天机器人,可以查看当前应用状态并在应用内部采取行动。该 AI 聊天机器人能够与应用的前端和后端通信,并通过插件与第三方服务(如 Salesforce、Dropbox 等)进行交互。支持生成式用户界面,快速启动。
🌟 <CopilotTextarea />
为任何 <textarea> 提供直接替换。AI 辅助文本生成,包括自动完成、AI 编辑和从头开始生成文本。基于用户的数据和 Copilot 应用上下文。只需将 textarea 更改为 CopilotTextarea 即可。
🌟 应用内代理(由 LangChain 驱动)
让代理可以访问实时的应用上下文,并允许代理在应用程序内部采取行动。
🌟 协同代理(由 LangChain 驱动,即将推出)
允许最终用户观察并介入应用内代理的操作,具有本地应用用户体验。如果中间步骤出现错误,最终用户可以纠正错误,并从该点重新开始代理操作。
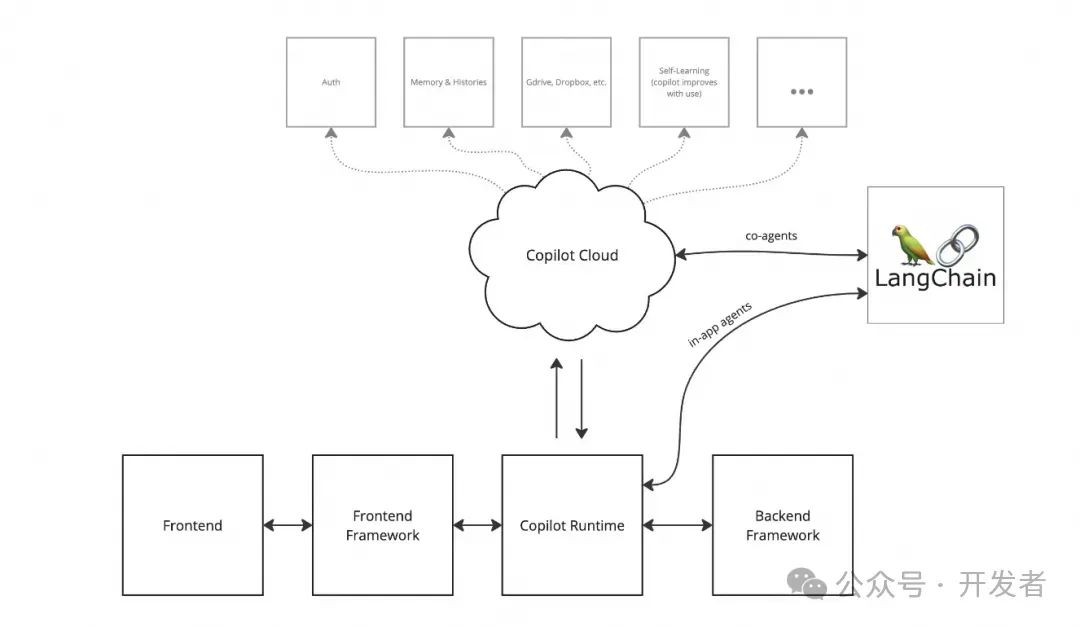
工作原理
定义以下简单的入口点到您的应用程序中,CopilotKit🪁 执行引擎将处理其余部分!
-
应用状态(前端 + 后端 + 第三方)
-
应用交互(通过纯 TypeScript 代码,前端 + 后端)
-
特定用途的 LLM 链
-
等等。
让我们将上述内容整合并完善到“安装与配置”章节中:
安装与配置
前提条件
-
需要安装 Node.js、React 环境、及相关的依赖库。
安装步骤
安装 CopilotKit
首先,安装 CopilotKit 前端包。根据您的包管理工具,选择以下命令之一进行安装:
-
使用 npm:
npm i @copilotkit/react-core @copilotkit/react-ui -
使用 yarn:
yarn add @copilotkit/react-core @copilotkit/react-ui -
使用 pnpm:
pnpm add @copilotkit/react-core @copilotkit/react-ui
设置前端
您需要在应用的根组件中包裹 CopilotKit 和 CopilotSidebar。推荐您在整个应用程序中使用这两个组件,以确保所有交互都能通过 CopilotKit 进行。
"use client";
import { CopilotKit } from "@copilotkit/react-core";
import { CopilotSidebar } from "@copilotkit/react-ui";
import "@copilotkit/react-ui/styles.css";

export default function RootLayout({children}) {
  return (
    <CopilotKit publicApiKey="请输入您的 API 密钥或自托管地址">
      <CopilotSidebar>
        {children}
      </CopilotSidebar>
    </CopilotKit>
  );
}
设置 Copilot 运行时端点
根据 Quickstart-Runtime 文档设置 Copilot 运行时端点。
https://docs.copilotkit.ai/getting-started/quickstart-runtime
提供上下文
为了让 Copilot 更好地辅助文本的完善、插入和编辑,您需要通过 useCopilotReadable 和 useMakeCopilotDocumentReadable React 钩子提供外部上下文。您还可以通过指定类别将特定上下文与特定的 textarea 绑定。
"use client";

import { useCopilotReadable, useMakeCopilotDocumentReadable } from "@copilotkit/react-core";

// 顶层数据传递
const employeeContextId = useCopilotReadable({
  description: "Employee name",
  value: employeeName
});

// 保持层级结构
useCopilotReadable({
  description: "Employee work profile",
  value: workProfile.description(),
  parentId: employeeContextId
});

// 文档传递
const document = {
  id: "2",
  name: "Travel Pet Peeves",
  sourceApplication: "Google Docs",
  iconImageUri: "/images/GoogleDocs.svg",
  getContents: () => "hello document",
};

useMakeCopilotDocumentReadable(document);
允许 Copilot 采取行动
通过使用 useCopilotAction 钩子,允许 Copilot 代表用户执行操作。
"use client";

import { useCopilotAction } from "@copilotkit/react-core";

useCopilotAction({
  name: "setEmployeesAsSelected",
  description: "Set the given employees as 'selected'",
  parameters: [
    {
      name: "employeeIds",
      type: "string[]",
      description: "The IDs of employees to set as selected",
      required: true,
    },
  ],
  handler: async ({ employeeIds }) => setEmployeesAsSelected(employeeIds),
});
CopilotTextarea 配置
CopilotTextarea 的配置与标准的 React <textarea /> 基本相同,主要区别在于额外的 autosuggestionsConfig 变量,该变量提供 Copilot 特有的配置。
import { CopilotTextarea } from "@copilotkit/react-textarea";
import { useState } from "react";

export function SomeReactComponent() {
  const [text, setText] = useState("");

  return (
    <CopilotTextarea
      className="px-4 py-4"
      value={text}
      onValueChange={(value: string) => setText(value)}
      placeholder="What are your plans for your vacation?"
      autosuggestionsConfig={{
        textareaPurpose:
          "Travel notes from the user's previous vacations. Likely written in a colloquial style, but adjust as needed.",
        chatApiConfigs: {
          suggestionsApiConfig: {
            forwardedParams: {
              max_tokens: 20,
              stop: [".", "?", "!"],
            },
          },
        },
      }}
    />
  );
}
配置说明
-
项目配置主要通过环境变量进行,例如数据库连接字符串、API 密钥等,需要在
.env文件中设置相应的变量。
使用指南
示例Demo
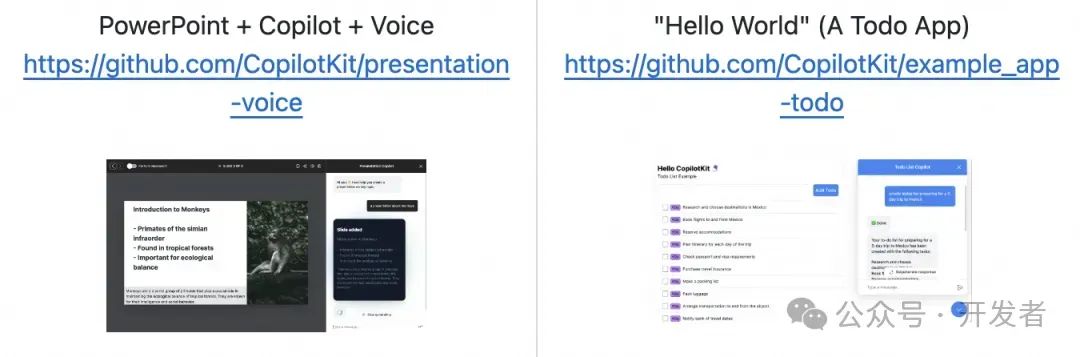
-
PowerPoint + Copilot + Voice
https://github.com/CopilotKit/presentation-voice -
"Hello World" (A Todo App)
https://github.com/CopilotKit/example_app-todo -
PowerPoint + Copilot
https://github.com/CopilotKit/presentation-demo -
Spreadsheets + Copilot
https://github.com/CopilotKit/spreadsheet-demo
文档与资源
API文档
-
提供 API 文档的链接,描述每个 API 的功能、参数和返回值,链接:[CopilotKit API 文档] :https://docs.copilotkit.ai/api
授权协议
-
本项目采用 MIT 许可证,您可以在项目的 [许可证文本]:https://github.com/CopilotKit/CopilotKit/LICENSE 中查看完整内容。
注:本文内容仅供参考,具体项目特性请参照官方 GitHub 页面的最新说明。
https://github.com/CopilotKit/CopilotKit

GitCode 天启AI是一款由 GitCode 团队打造的智能助手,基于先进的LLM(大语言模型)与多智能体 Agent 技术构建,致力于为用户提供高效、智能、多模态的创作与开发支持。它不仅支持自然语言对话,还具备处理文件、生成 PPT、撰写分析报告、开发 Web 应用等多项能力,真正做到“一句话,让 Al帮你完成复杂任务”。
更多推荐


 20
20 0
0- 0


 已为社区贡献11条内容

所有评论(0)