
【大模型学习 | BLIP2跌倒检测项目实战(一)】
🔴 可以发现,这个回答其实和我们想要的答案差别很多,我只是想知道有没有人摔倒在地上,模型却把整个图像的描述回答了出来,和我们的提问丝毫没有关系,不管我们怎么提问,模型只会把图像完整的阐述出来,这与我们想要的效果差太多。因此,当现有的 Dataset Builder 无法满足我们的任务需求时,我们需要自定义构建过程,以确保训练管道能够正确加载并处理我们的数据。编者认为自己已经把整个微调过程能犯下的
BLIP2 跌倒项目实战(一)
在学习完
BLIP,BLIP2模型原理后,如何应用于工业开发至关重要。为此,本次项目将从零到一实现基于BLIP2的跌倒检测,实现部署→数据构建→微调→量化→部署的工业化项目。
不同库版本间有一定的依赖性,条件允许的话可以直接用编者的这套环境,不用花太大时间在配置环境上。
python: 3.10
torch: 2.7.1
torchvision: 0.22.1
transformer: 4.31.0
hugginface-hub: 0.25.2
Lavis: https://github.com/salesforce/LAVIS/tree/main/lavis
1️⃣ 基于LAVIS实现
pretrain_flant5xl : encoder-decoder模型;可以根据需求调整预训练模型;目前LAVIS只支持flant5xl 、flant5xxl
pretrain_opt2.7b : decoder-only 模型;
自定义一个python文件:
from lavis.models import load_model_and_preprocess
import gradio as gr
import torch

# 加载 BLIP-2 模型(注意:用的是 Flan-T5 Base)
device = torch.device("cuda" if torch.cuda.is_available() else "cpu")
model, vis_processors, _ = load_model_and_preprocess(
    name="blip2_t5",
    model_type="pretrain_flant5xl",
    # name="blip2_opt",
    # model_type="pretrain_opt2.7b",
    is_eval=True,
    device=device,
)
2️⃣ 加载本地图像
from PIL import Image
import requests
url = "../dataset/falldown/images/1.jpg"
raw_image = Image.open(url).convert("RGB")

question = "Is someone falling in this image? please answer yes or no:"

# 预训练图像模型提取特征
image = vis_processors["eval"](raw_image).unsqueeze(0).to(device)

sample = {
    "image": image,
    "text_input": question
}

output = model.generate(sample)
print("回答:", output[0])
# 回答:a man is being helped by another man on the ground
🔴 可以发现,这个回答其实和我们想要的答案差别很多,我只是想知道有没有人摔倒在地上,模型却把整个图像的描述回答了出来,和我们的提问丝毫没有关系,不管我们怎么提问,模型只会把图像完整的阐述出来,这与我们想要的效果差太多。我想要的效果是:
提问:是否有人倒地? 回答:“yes” / “No” 但是目前模型的回答是关于整段话的描述,无论怎么改提示词都没用
🟢 为此,构建一份新的数据集微调模型至关重要。
二、模型微调——数据集构建
编者认为自己已经把整个微调过程能犯下的错误都犯过了,因此,跟着编者的思路进行数据集的构建、可以很好的避开bug ❗❗❗
3️⃣ 数据集构建
数据集的文件目录如下,在数据文件下包括images子目录还有一个json文件,其中:
images子目录:编者直接从百度上加载了10张跌倒图像;
json文件: 该文件记录了图像数据的问答信息,以及各个数据的键值对;
⚠️ 这一部分如果不是和编者一样做vqa问答的话,一定要去看builder构建的键是怎么定义的❗❗❗


由于编者已经走过了许多的坑,以下直接给出最终的json文件:
[
  {
    "instance_id": 1,
    "image": "1.jpg",
    "text_input": "Is anyone falling",
    "answer": ["yes"]
  },
  {
    "instance_id": 2,
    "image": "2.jpg",
    "text_input": "Is anyone falling in this image?",
    "answer": ["yes"]
  },
]
在创建json文件时,一定要注意:
✅ 键值对的键是否符合任务builder的键,若不符合,需不需要重新构建一个新的builder(编者重新构建了)
✅ “answer”: 对应的一定是一个列表,编者就是"answer": "yes"一直报了一个数据维度错误;RuntimeError: shape ‘[24, -1, 32, 64]’ is invalid for input of size 655360
这是因为图文任务会默认遍历answer列表中的每个answer, 这样子的”yes“会被迫变为”y“,”e“,”s“三个答案。
4️⃣ Dataset & builder 构建
在执行train.py时,LAVIS 框架必须通过指定的
builder构建数据集。因此,当现有的 Dataset Builder 无法满足我们的任务需求时,我们需要自定义构建过程,以确保训练管道能够正确加载并处理我们的数据。
🧱 构建Dataset
自定义 Dataset 通常继承自 LAVIS 中提供的基础类,如:
ImageTextPairDataset—— 用于图文对任务COCOVQADataset—— 用于视觉问答(VQA)任务
为了应对不同任务的需求,编者也是重新构建了Dataset,在LAVIS\lavis\datasets\datasets路径下创建自己的Dataset:
import os
import json
import random
from PIL import Image
from lavis.datasets.datasets.vqa_datasets import VQADataset, VQAEvalDataset
from collections import OrderedDict
class __DisplMixin:
    def displ_item(self, index):
        sample, ann = self.__getitem__(index), self.annotation[index]

        return OrderedDict(
            {
                "file": ann["image"],
                "question": ann["question"],
                "question_id": ann["question_id"],
                "answers": "; ".join(ann["answer"]),
                "image": sample["image"],
            }
        )
class FalldownVQADataset(VQADataset, __DisplMixin):
    def __init__(self, vis_processor, text_processor, vis_root, ann_paths):
        super().__init__(vis_processor, text_processor, vis_root, ann_paths)

    def __getitem__(self, index):
        ann = self.annotation[index]
        image_path = os.path.join(self.vis_root, ann["image"])
        image = Image.open(image_path).convert("RGB")

        image = self.vis_processor(image)
        question = self.text_processor(ann["text_input"])

        answer_weight = {}
        for answer in ann["answer"]:
            if answer in answer_weight.keys():
                answer_weight[answer] += 1 / len(ann["answer"])
            else:
                answer_weight[answer] = 1 / len(ann["answer"])

        answers = list(answer_weight.keys())
        weights = list(answer_weight.values())

        return {
            "image": image,
            "text_input": question,
            "answers": answers,
            "weights": weights,
        }
### 必须要!!!!因为训练阶段模型是根据text_output取值,但是前期是通过answer键取值
class FalldownVQAInstructDataset(FalldownVQADataset):
    def __getitem__(self, index):
        data = super().__getitem__(index)
        if data != None:
            data['text_output'] = random.choice(data["answers"])
        return data
    def collater(self, samples):
        data = super().collater(samples)
        data['text_output'] = data['answer']
        return data
🧱 构建Builder
LAVIS 框架必须通过指定的 builder 构建数据集,因此,还需要在LAVIS\lavis\datasets\builders路径下创建自己的builder:
from lavis.common.registry import registry

from lavis.datasets.builders.base_dataset_builder import BaseDatasetBuilder
from lavis.datasets.datasets.image_text_pair_datasets import ImageTextPairDataset, ImageTextPairInstructDataset
from lavis.datasets.datasets.laion_dataset import LaionDataset, LaionInstructDataset
from lavis.datasets.datasets.my_vqa_dataset import FalldownVQAInstructDataset
@registry.register_builder("my_falldown_dataset") #注册名字,这个名字在配置文件中至关重要!!!
class MyDatasetBuilder(BaseDatasetBuilder):
    train_dataset_cls = FalldownVQAInstructDataset
    eval_dataset_cls = FalldownVQAInstructDataset
	#跳过下载阶段,默认是有的
    def _download_data(self):
        return
🧱 在LAVIS\lavis\datasets\builders\__init__.py中,导入自己的builder
from lavis.datasets.builders.my_data_builder import MyDatasetBuilder
三、模型微调
创建好数据集以及相关的类后,就可以开始配置训练文件了,这个文件相比之下就比较简单了
5️⃣ 训练文件配置
需要注意的事项:
✅ datasets下的注册数据名字一定要和我们自己的注册的名字一样,不然会出现:AttributeError: ‘NoneType’ object has no attribute ‘default_config_path’
✅ run: 的task键值对不能省略
✅ 我是windows下进行微调的,因此run\distributed设为False,但是设为False,因此直接把LAVIS\lavis\runners\runner_base.py路径下第422行的dist.barrier()注释掉,不然会分布式错误:ValueError: Default process group has not been initialized, please make sure to call init_process_group.
自己创建一个yaml文件:
model:
  arch: blip2_t5
  model_type: pretrain_flant5xl
  load_pretrained: True
  t5_model: google/flan-t5-xl
  pretrained: "E:/root/autodl-tmp/blip2_pretrained_flant5xl.pth"
  freeze_vit: True

datasets:
  my_falldown_dataset:
    data_type: images
    vis_processor:
      train:
        name: "blip_image_train"
        image_size: 224
    text_processor:
      train:
#        name: "blip_caption"
        name: "blip_instruction"
    build_info:
      images:
        storage: E:/LLM/dataset/falldown/images
      annotations:
        train:
          storage:
            - E:/LLM/dataset/falldown/train.json
        val:
          storage:
            - E:/LLM/dataset/falldown/train.json
        test:
          storage:
            - E:/LLM/dataset/falldown/train.json
run:
  distributed: False
  task: vqa
  lr_sched: "linear_warmup_cosine_lr"
  init_lr: 1e-4
  min_lr: 1e-5
  warmup_lr: 1e-6
  weight_decay: 0.05
  max_epoch: 50
  batch_size_train: 2
  batch_size_eval: 2
  num_workers: 4
  warmup_steps: 2000
  seed: 42
  output_dir: "output/BLIP2/Pretrain_stage2"
  amp: True
  resume_ckpt_path: null
  evaluate: False
  train_splits: ["train"]
  device: "cuda"
  world_size: 1
  dist_url: "env://"
6️⃣ 微调
python .\train.py --cfg-path E:\LLM\dataset\falldown\my.yaml
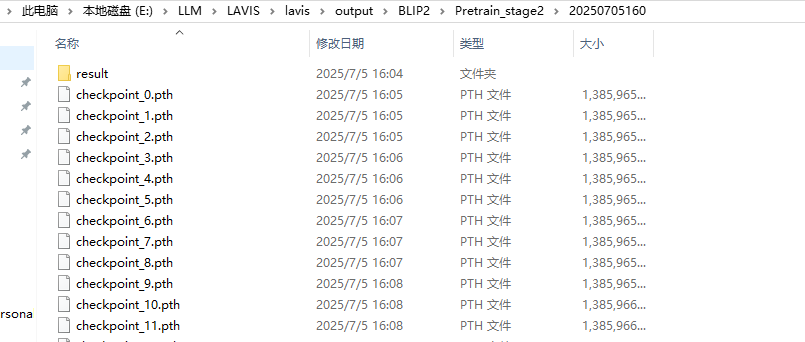
- 最终训练结果权重保存在配置文件的
output_dir路径下:
- 加载微调后的权重:
from lavis.models import load_model_and_preprocess
import gradio as gr
import torch

# 加载 BLIP-2 模型(注意:用的是 Flan-T5 Base)
device = torch.device("cuda" if torch.cuda.is_available() else "cpu")
model, vis_processors, _ = load_model_and_preprocess(
    name="blip2_t5",
    model_type="pretrain_flant5xl",

    # name="blip2_opt",
    # model_type="pretrain_opt2.7b",
    is_eval=True,
    device=device,
)
ckpt = torch.load("./lavis/output/BLIP2/Pretrain_stage2/20250705160/checkpoint_30.pth", map_location="cpu")
msg = model.load_state_dict(ckpt["model"], strict=False)
from PIL import Image
url = "../dataset/falldown/images/1.jpg"
raw_image = Image.open(url).convert("RGB")
question = "Anyone falldown?"

image = vis_processors["eval"](raw_image).unsqueeze(0).to(device)
sample = {
    "image": image,
    "text_input": question
}

output = model.generate(sample)
print("回答:", output[0])
# 回答: "yes"
⛔ 请注意:如果想真正的微调实现自己的任务,仅仅这几条数据是不够的,还需要加上vqa的数据集,不然模型只会输出”yes" ❗❗❗

GitCode 天启AI是一款由 GitCode 团队打造的智能助手,基于先进的LLM(大语言模型)与多智能体 Agent 技术构建,致力于为用户提供高效、智能、多模态的创作与开发支持。它不仅支持自然语言对话,还具备处理文件、生成 PPT、撰写分析报告、开发 Web 应用等多项能力,真正做到“一句话,让 Al帮你完成复杂任务”。
更多推荐


 31
31 0
0- 0


 已为社区贡献1条内容

所有评论(0)