
使用Anconda创建Object Detection Api虚拟环境
1.创建Object Detection Api虚拟环境,名称为:object_detectionconda create -n object_detection python=3.82.激活环境:activate object_detection3.定位到models/research文件夹下:4.在research文件夹下安装Object Detection,通过豆瓣源下载:python -m
1.创建Object Detection Api虚拟环境,名称为:object_detection
conda create -n object_detection python=3.8
2.激活环境:
activate object_detection
3.定位到models/research文件夹下: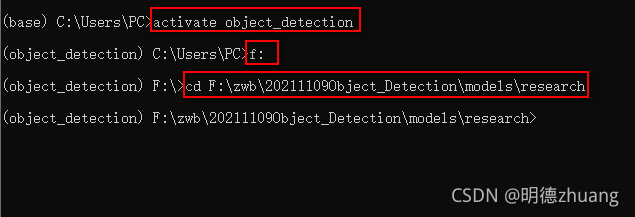
4.在research文件夹下安装Object Detection,通过豆瓣源下载:
python -m pip install . -i https://pypi.doubanio.com/simple

下载中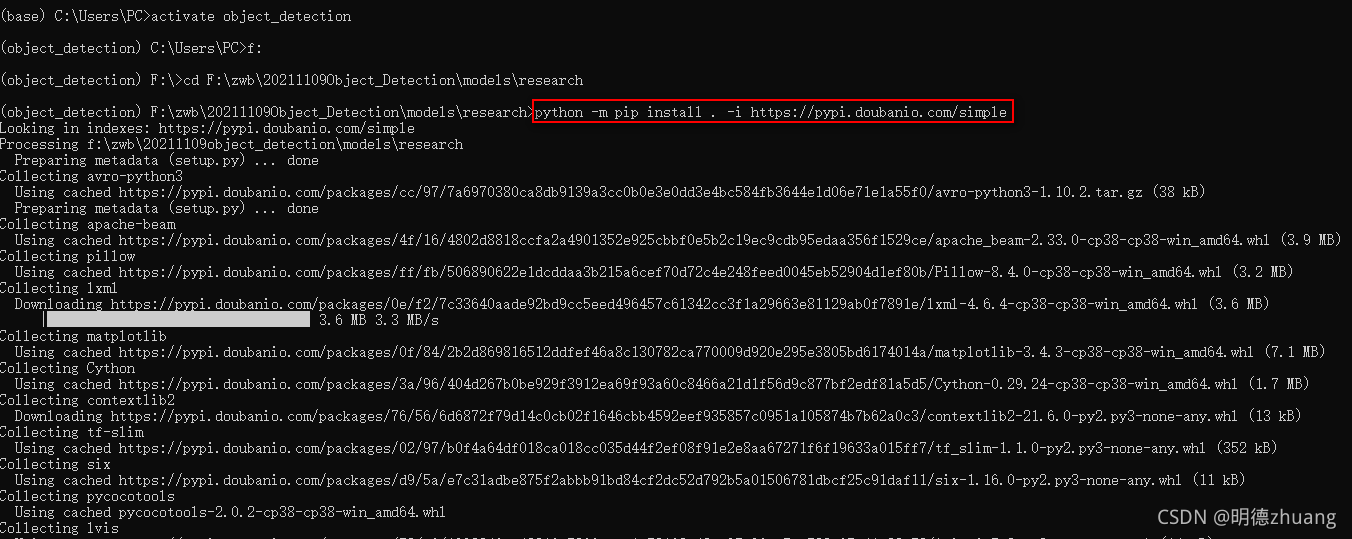
倘若下载速度过慢,可以尝试其他镜像源,常用的有:
清华:
https://pypi.tuna.tsinghua.edu.cn/simple
阿里云:
https://mirrors.aliyun.com/pypi/simple
中国科技大学:
https://pypi.mirrors.ustc.edu.cn/simple
华中理工大学:
https://pypi.hustunique.com
山东理工大学:
https://pypi.sdutlinux.org
object detection虚拟环境安装完成,如下图: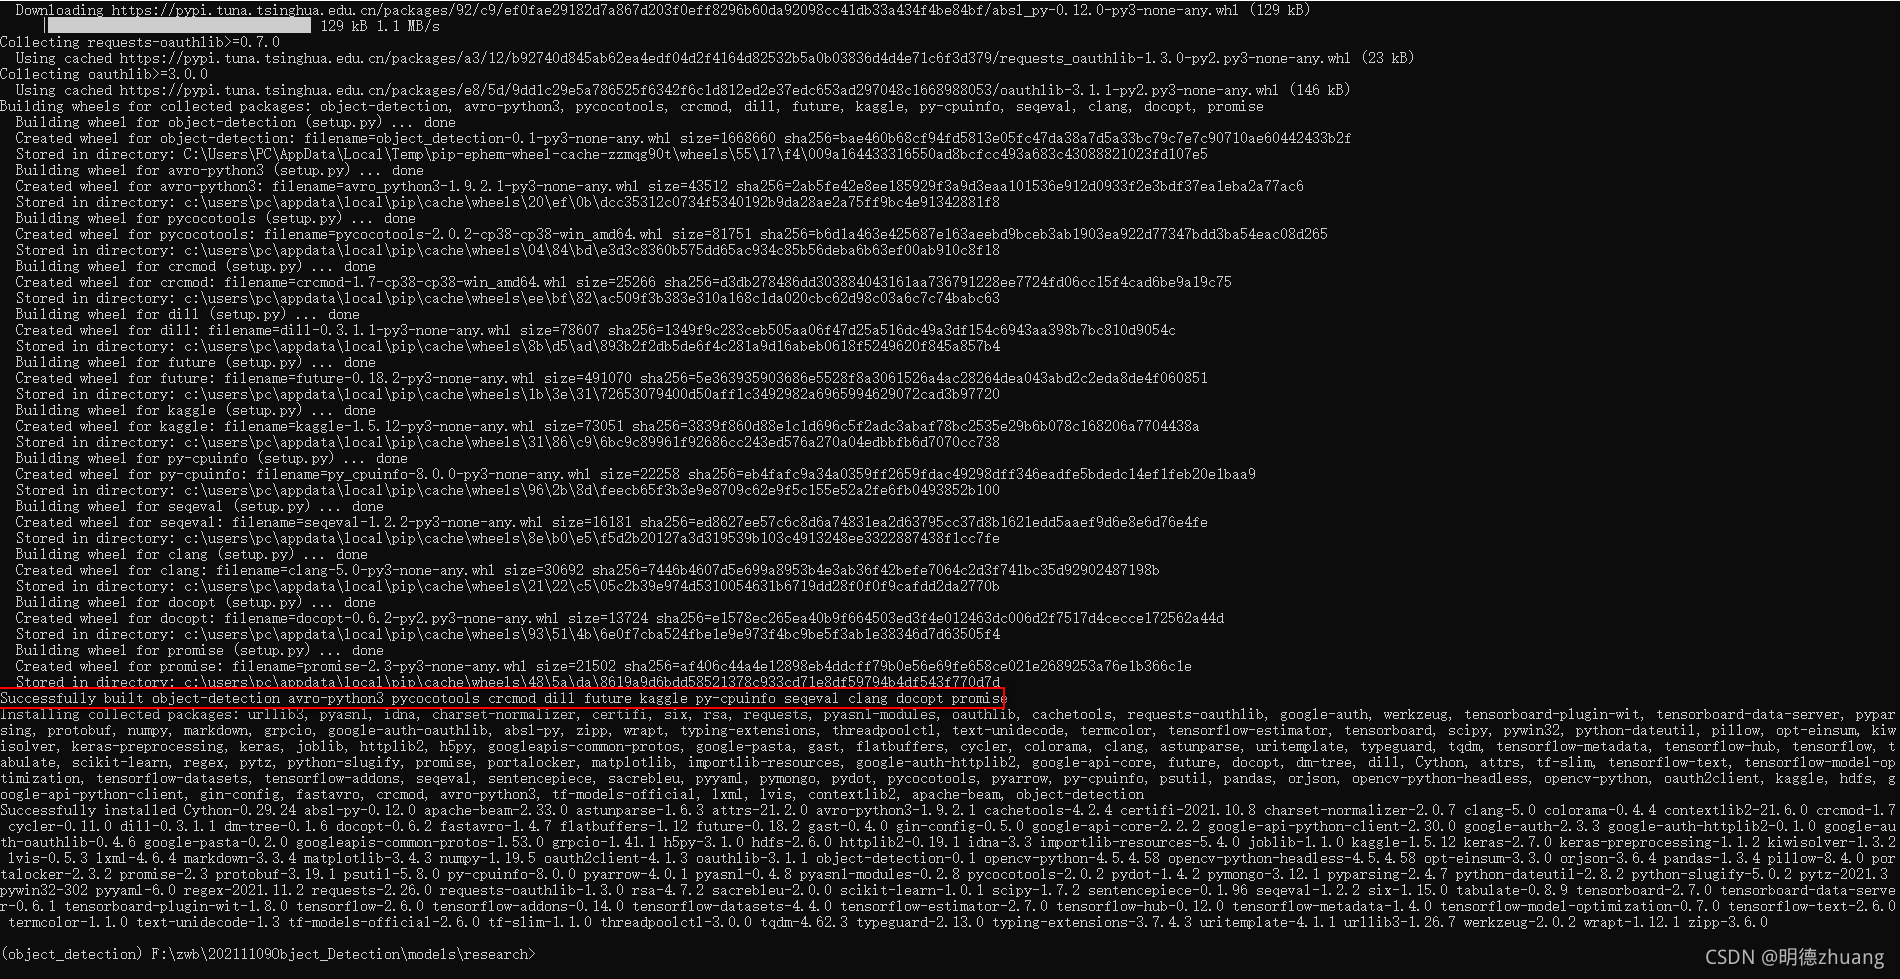
查看该环境里的python版本、tensorflow版本以及GPU是否正常运行。由下图可知,Object Detection安装成功,关闭Anconda Prompt窗口。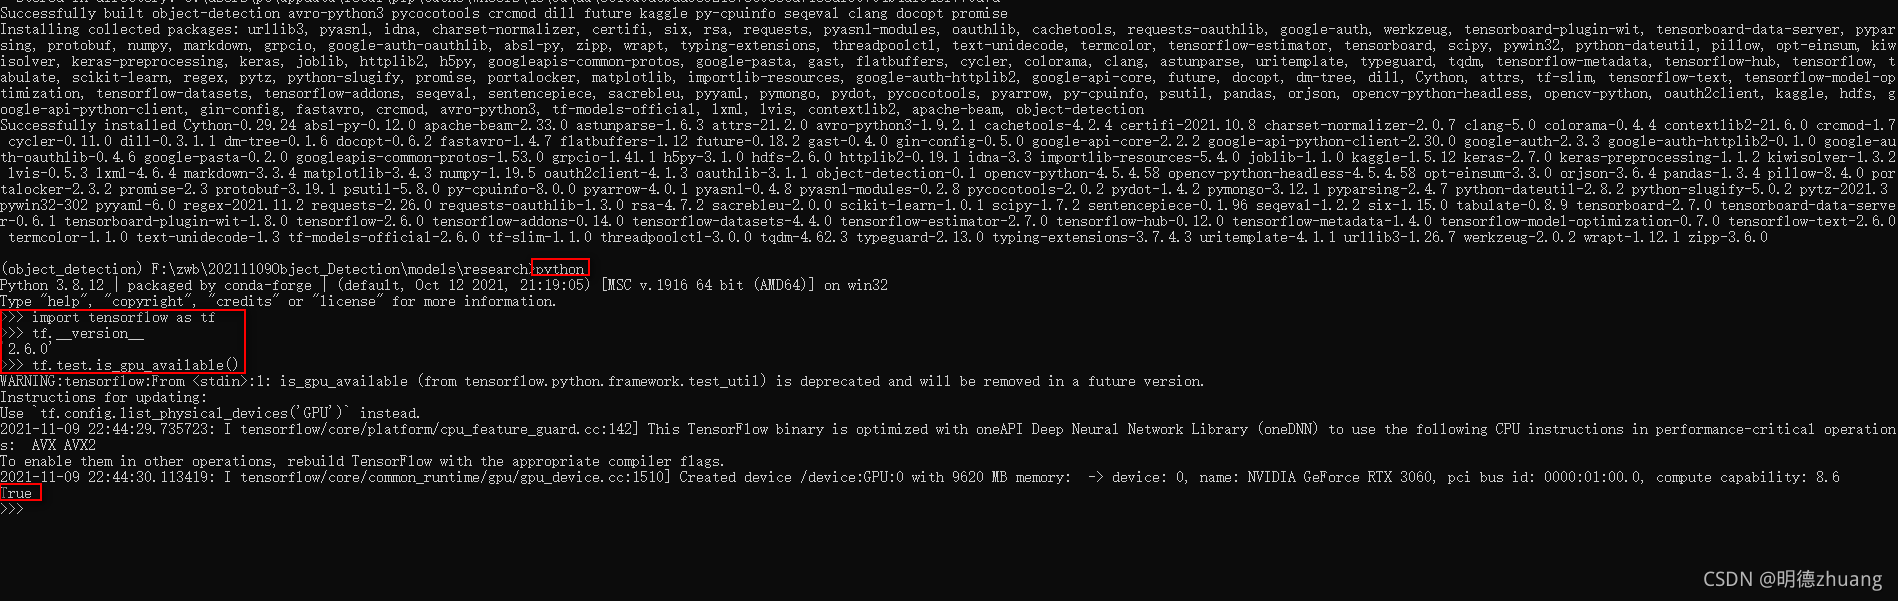
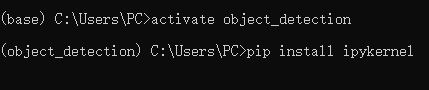
5.安装虚拟环境里的ipykernel(在该虚拟环境下注册notebook)和notebook
5.1安装ipykernel
pip install ipykernel
5.2 对虚拟的环境进行显示。我的虚拟环境名称为object_detection,因为我这里就将它设置显示为object_detection(当然也可以显示为其他名称)
python -m ipykernel install --user --name object_detection --display-name object_detection

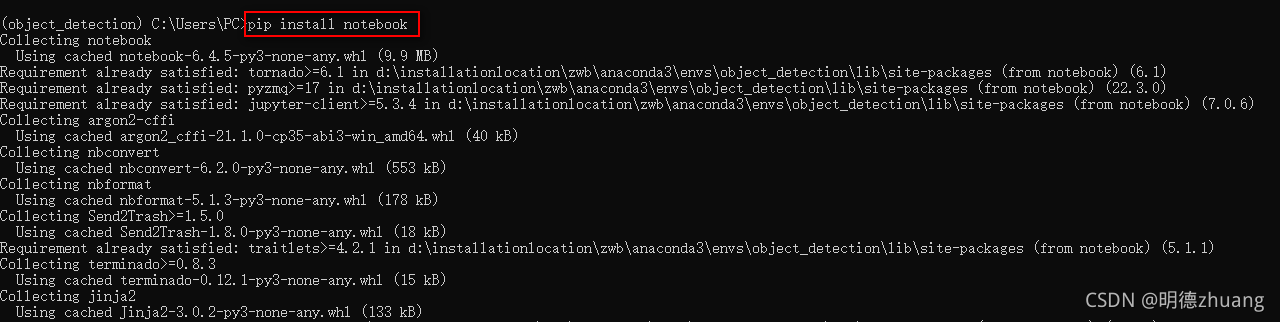
5.3安装notebook
pip install notebbok
6.进入虚拟环境下的notebook,为:
ipython notebook
或者,为:
jupyter notebook

可见,我们的object_detection虚拟环境已经存在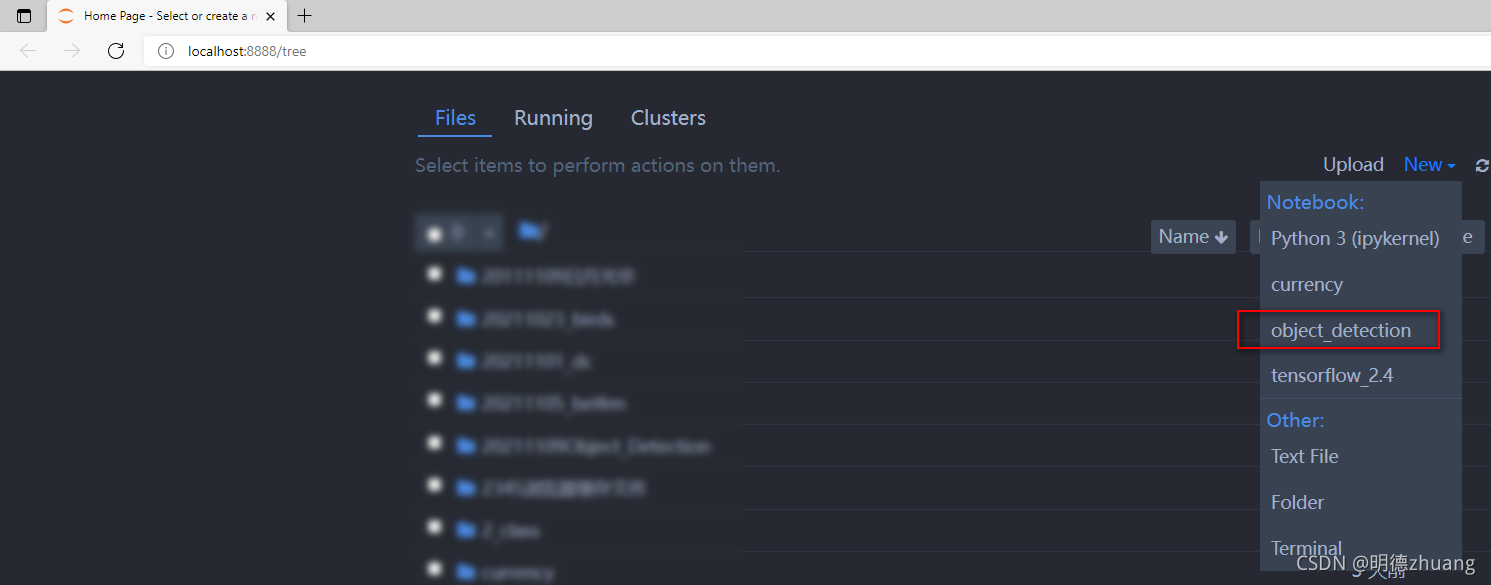
然后可以在该环境下进行相关操作,如下图: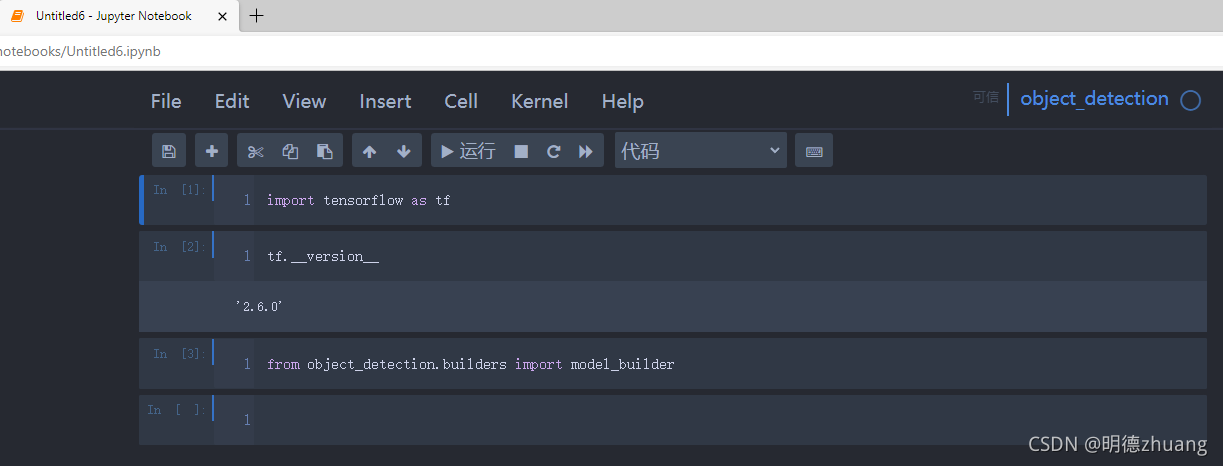

GitCode 天启AI是一款由 GitCode 团队打造的智能助手,基于先进的LLM(大语言模型)与多智能体 Agent 技术构建,致力于为用户提供高效、智能、多模态的创作与开发支持。它不仅支持自然语言对话,还具备处理文件、生成 PPT、撰写分析报告、开发 Web 应用等多项能力,真正做到“一句话,让 Al帮你完成复杂任务”。
更多推荐


 0
0 0
0- 0


 已为社区贡献2条内容

所有评论(0)