
本地搭建部署全模态模型Qwen2.5-Omni-3B
阿里开源的全模态模型Qwen2.5-Omni-3B在本地搭建环境部署配置教程。
通义千问全模态大模型Qwen2.5-Omni-3B本地部署
Qwen2.5-Omni
阿里通义千问于2025年3月底开源全模态大模型 Qwen2.5-Omni,该模型可在本地部署实现聊天对话,聊天对话结果可生成音频。4月30日,该模型开源了 Qwen2.5-Omni-3B 版本,较之前 7B 相比,代码运行时的推理时间减少。

本地软硬件环境
本地采用的计算机硬件和软件配置环境如下表:
| 硬件配置 | 类型 | 软件环境安装 | 版本 |
| 操作系统 | Win 11 家庭中文版64位 | 编程语言 | Anaconda3 、Python 3.11 |
| CPU | i7-13700KF | GPU加速库 | CUDA 11.1.0、cuDNN 8.0.4.30 |
| GPU | NVIDIA Geforce RTX 3080 | 深度学习框架 | PyTorch 2.6.0+cu118 、TorchVision 0.21.0+cu118 |
| 内存 | 32GB | 其它依赖 | qwen-omni-utils 0.0.4、accelerate 1.6.0 等 |
搭建 Qwen2.5-Omni-3B 环境
Qwen2.5-Omni 官方 Github:https://github.com/QwenLM/Qwen2.5-Omni
Qwen2.5-Omni 官方中文教程:https://github.com/QwenLM/Qwen2.5-Omni/blob/main/README_CN.md
创建虚拟环境
Python 版本对于多模态模型的部署有要求,在低版本的python环境下运行多模态程序可能会报错。
因此,创建一个 Python 3.11 版本的虚拟环境,名称为 Qwen2.5-Omni-3B,指令如下:
conda create -n Qwen2.5-Omni-3B python==3.11
Python 3.11 版本环境创建完成后,在安装所需的各个库之前,默认指定采用清华镜像源进行安装,指令:
set PIP_INDEX_URL=https://pypi.tuna.tsinghua.edu.cn/simple
Transformers 库源码安装
配置安装 Qwen2.5-Omni-3B 所需 Transformers 库, 官方指定特定版本的 Transformers 源码编译安装,使用其它版本编译的话在后面对话推理时有可能出现"KeyError: ‘qwen2_5_omni’"的错误,如下:

官方给定的 Transformers 库安装指令为:
pip install transformers==4.52.3
但在实际情况下受网络问题,建议直接去 Github 离线下载指定分支版本的 Transformers 库, Github 网址为:
https://github.com/huggingface/transformers/tree/v4.51.3-Qwen2.5-Omni-preview
在 Github 源码中,点击 Download ZIP 即可下载,如下图,下载后的 zip 包进行解压。 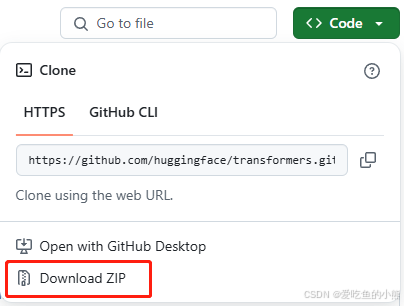 之后,在虚拟环境下切换到下载的源码路径中,运行下面的指令,程序开始自动源码安装 Transformers 库: ```bash pip install . ``` 等待安装完成即可。
安装依赖库
下载安装 PyTorch 和 Torchvision 离线包,官网下载不同版本:https://download.pytorch.org/whl/torch
本文 PyTorch 使用 torch-2.6.0 + cu118 的版本,下载链接为:torch-2.6.0 + cu118
本文 Torchvision 使用 torchvision-0.21.0 + cu118 的版本,下载链接为:torchvision-0.21.0 + cu118
下载完成后在终端输入以下命令安装完成 PyTorch 和 Torchvision 的安装:
pip install torch-2.6.0+cu118-cp311-cp311-win_amd64.whl
pip install torchvision-0.21.0+cu118-cp311-cp311-win_amd64.whl
通过以下命令验证虚拟环境里安装 PyTorch 的 GPU 版本是否可用:
import torch
print(torch.cuda.is_available())
此外,还需要安装以下依赖库,cmd 终端直接输入:
pip install accelerate==1.6.0
pip install qwen-omni-utils==0.0.4
模型下载
Qwen2.5-Omni-3B 使用魔塔社区 ModelScope 来获取模型,这也是官网强烈建议的,下载链接:
https://modelscope.cn/models/Qwen/Qwen2.5-Omni-3B/files
下载后的所有模型放置于 Qwen2.5-Omni-3B 文件夹中,如下:

实现聊天对话
无音频
在官方的程序上进行修改(官方的例子是视频对话,一般超显存),实现简单的聊天对话。需要修改指定模型的路径(第7行和第12行);设置聊天对话的问题(第56行)。以下代码运行后不生成音频。
import soundfile as sf
import time
from transformers import Qwen2_5OmniForConditionalGeneration, Qwen2_5OmniProcessor
from qwen_omni_utils import process_mm_info

# 加载模型
model = Qwen2_5OmniForConditionalGeneration.from_pretrained("D:/Qwen2.5-Omni-3B/Qwen2.5-Omni-3B", torch_dtype="auto", device_map="cuda")

# 不需要音频输出,节省内存,generate的return_audio设置为False
model.disable_talker()

processor = Qwen2_5OmniProcessor.from_pretrained("D:/Qwen2.5-Omni-3B/Qwen2.5-Omni-3B")

def inference(prompt):
    # 对话
    conversation = [
        {
            "role": "system",  # 音频输出的提示词必须按照指定的设定
            "content": [
                {"type": "text","text": "You are Qwen, a virtual human developed by the Qwen Team, Alibaba Group, capable of perceiving auditory and visual inputs, as well as generating text and speech."}
            ],
        },
        {
            "role": "user",
            "content": [
                # {"type": "video", "video": "https://qianwen-res.oss-cn-beijing.aliyuncs.com/Qwen2.5-Omni/draw.mp4"},
                {"type": "text", "text": prompt},
                # {"type": "audio", "audio": audio_path},
            ],
        },
    ]

    # set use audio in video
    # 是否使用视频中的音频
    USE_AUDIO_IN_VIDEO = False

    # Preparation for inference
    text = processor.apply_chat_template(conversation, add_generation_prompt=True, tokenize=False)
    # print("text:", text)
    # 第一处,在数据预处理中
    audios, images, videos = process_mm_info(conversation, use_audio_in_video=USE_AUDIO_IN_VIDEO)
    # 第二处,在模型处理中
    inputs = processor(text=text, audio=audios, images=images, videos=videos, return_tensors="pt", padding=True,use_audio_in_video=USE_AUDIO_IN_VIDEO)
    inputs = inputs.to(model.device).to(model.dtype)

    # Inference: Generation of the output text and audio
    # 第三处,在模型推理中
    text_ids = model.generate(**inputs, use_audio_in_video=USE_AUDIO_IN_VIDEO, return_audio=False)  # 不返回音频

    text = processor.batch_decode(text_ids, skip_special_tokens=True, clean_up_tokenization_spaces=False)
    return text


start = time.time()

prompt = "地球到太阳之间有多远?"
response = inference(prompt=prompt)
print('response[0]:',response[0])

end = time.time()
print("共用时%s"%(end-start))
以上代码运行后的对话结果如下图:

输出音频
若要将对话结果自动生成音频,以上代码需要做如下改动:
1. 注释掉第10行代码。
# 不需要音频输出,节省内存,generate的return_audio设置为False
# model.disable_talker()
2. 更改行代码,指定返回音频。
其中,speaker 参数来指定音色类型,Chelsie为女声,Ethan为男声,默认为Chelsie。
text_ids, audio = model.generate(**inputs, use_audio_in_video=USE_AUDIO_IN_VIDEO, speaker="Chelsie") # 返回音频
3. 添加保存输出音频的代码。
# 保存输出结果音频
sf.write(
    "output1.wav",
    audio.reshape(-1).detach().cpu().numpy(),
    samplerate=24000,
)
修改后的完整代码如下,代码运行后可自动生成 output1.wav 的音频文件,推理运行速度会比无音频时慢一些。
import soundfile as sf
import time
from transformers import Qwen2_5OmniForConditionalGeneration, Qwen2_5OmniProcessor
from qwen_omni_utils import process_mm_info

# 加载模型
model = Qwen2_5OmniForConditionalGeneration.from_pretrained("D:/Qwen2.5-Omni-3B/Qwen2.5-Omni-3B", torch_dtype="auto", device_map="cuda")

# 不需要音频输出,节省内存,generate的return_audio设置为False
# model.disable_talker()

processor = Qwen2_5OmniProcessor.from_pretrained("D:/Qwen2.5-Omni-3B/Qwen2.5-Omni-3B")

def inference(prompt):
    # 对话
    conversation = [
        {
            "role": "system",  # 音频输出的提示词必须按照指定的设定
            "content": [
                {"type": "text","text": "You are Qwen, a virtual human developed by the Qwen Team, Alibaba Group, capable of perceiving auditory and visual inputs, as well as generating text and speech."}
            ],
        },
        {
            "role": "user",
            "content": [
                # {"type": "video", "video": "https://qianwen-res.oss-cn-beijing.aliyuncs.com/Qwen2.5-Omni/draw.mp4"},
                {"type": "text", "text": prompt},
                # {"type": "audio", "audio": audio_path},
            ],
        },
    ]

    # set use audio in video
    # 是否使用视频中的音频
    USE_AUDIO_IN_VIDEO = False

    # Preparation for inference
    text = processor.apply_chat_template(conversation, add_generation_prompt=True, tokenize=False)
    # print("text:", text)
    # 第一处,在数据预处理中
    audios, images, videos = process_mm_info(conversation, use_audio_in_video=USE_AUDIO_IN_VIDEO)
    # 第二处,在模型处理中
    inputs = processor(text=text, audio=audios, images=images, videos=videos, return_tensors="pt", padding=True,use_audio_in_video=USE_AUDIO_IN_VIDEO)
    inputs = inputs.to(model.device).to(model.dtype)

    # Inference: Generation of the output text and audio
    # 第三处,在模型推理中
    text_ids, audio = model.generate(**inputs, use_audio_in_video=USE_AUDIO_IN_VIDEO, speaker="Chelsie") # 返回音频

    text = processor.batch_decode(text_ids, skip_special_tokens=True, clean_up_tokenization_spaces=False)
    # 保存输出结果音频
    sf.write(
        "output1.wav",
        audio.reshape(-1).detach().cpu().numpy(),
        samplerate=24000,
    )
    return text


start = time.time()

prompt = "地球到太阳之间有多远?"
response = inference(prompt=prompt)
print('response[0]:',response[0])

end = time.time()
print("共用时%s"%(end-start))
Qwen2.5-Omni-3B 除了用于聊天对话外,还可以输入音频或者视频进行对话,在以上代码中添加相应的文件路径即可。

GitCode 天启AI是一款由 GitCode 团队打造的智能助手,基于先进的LLM(大语言模型)与多智能体 Agent 技术构建,致力于为用户提供高效、智能、多模态的创作与开发支持。它不仅支持自然语言对话,还具备处理文件、生成 PPT、撰写分析报告、开发 Web 应用等多项能力,真正做到“一句话,让 Al帮你完成复杂任务”。
更多推荐


 41
41 0
0- 0


 已为社区贡献1条内容

所有评论(0)