
在Android设备部署PyTorch模型
Pytorch Mobile Android参考文献现如今,在边缘设备上运行机器学习/深度学习变得越来越流行,它需要更低的时延。而从Pytorch 1.3开始,我们就可以使用Pytorch将模型部署到Android或者ios设备中。参考文献https://blog.csdn.net/karry_zzj/article/details/102827337...

Pytorch Mobile Android
现如今,在边缘设备上运行机器学习/深度学习变得越来越流行,它需要更低的时延。
而从Pytorch 1.3开始,我们就可以使用Pytorch将模型部署到Android或者ios设备中。
Pytorch官方文档:https://pytorch.org/mobile/home/
Pytorch官方文档中提供关于Pytorch-mobile的Demo:https://github.com/pytorch/android-demo-app
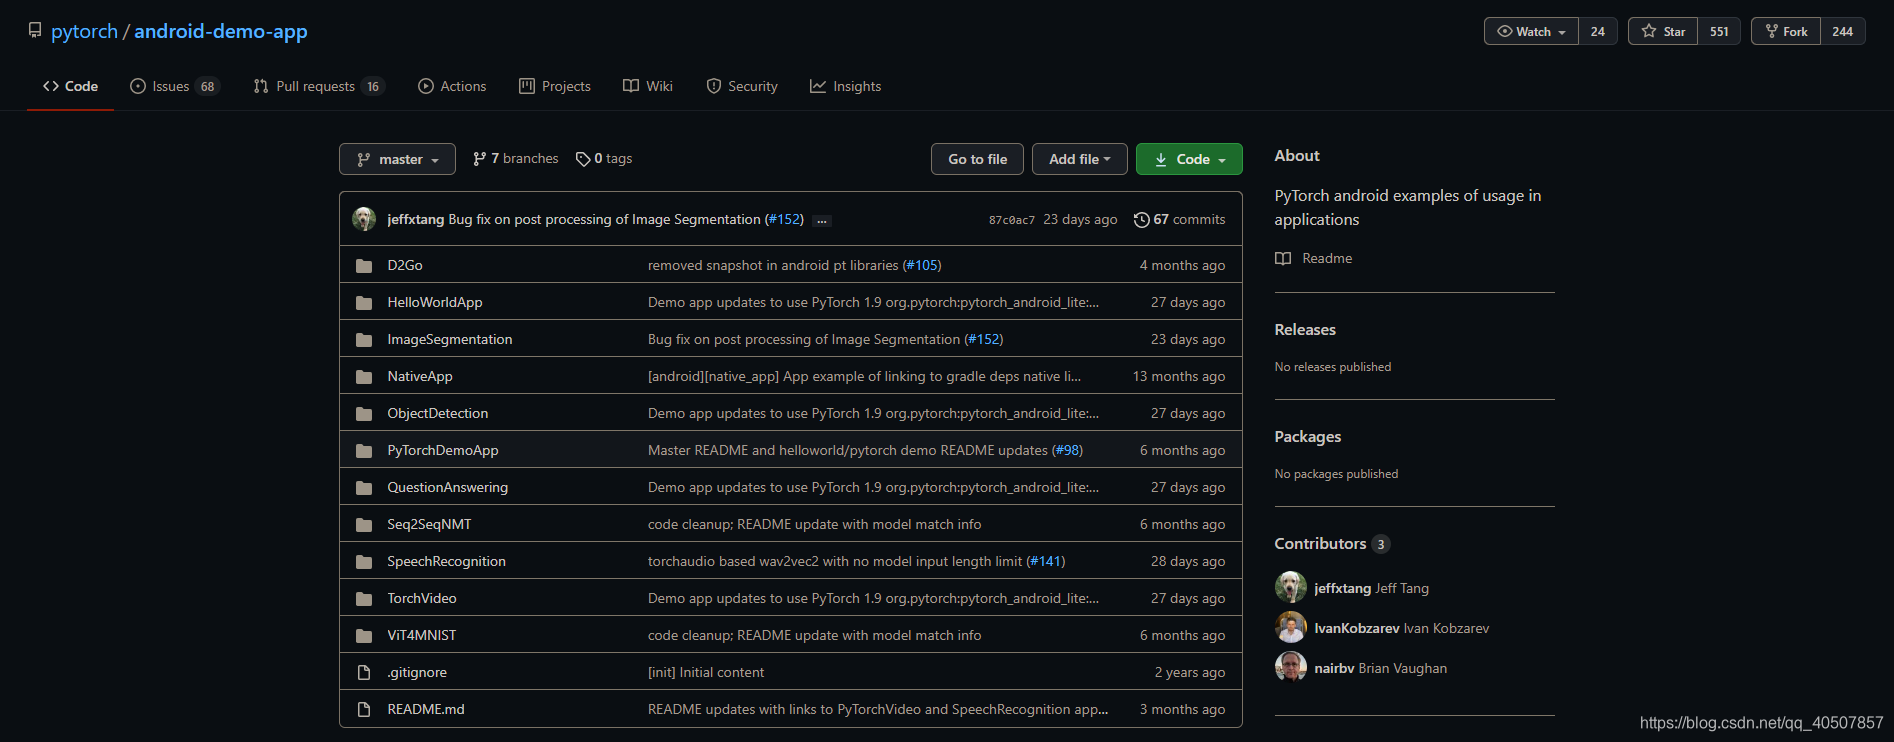
主要包含了两个APP应用,一个简单的在神经网络领域中的“hello world"项目,另一个就更复杂了一些,有图形识别和语言识别。
我们接下来研究一下Pytorch Mobile的项目流程。
Demo 1 HelloWorldApp
1 模型准备
首先我们需要先训练好的模型保存好。比如我在Pycharm写了经典CNN模型MobileNet-v3。
import torch
import torchvision
from torch.utils.mobile_optimizer import optimize_for_mobile

model = torchvision.models.mobilenet_v3_small(pretrained=True)
model.eval()
example = torch.rand(1, 3, 224, 224)
traced_script_module = torch.jit.trace(model, example)
optimized_traced_model = optimize_for_mobile(traced_script_module)
optimized_traced_model._save_for_lite_interpreter("./mobilenet_v3_small_model.pt")
在 checkpoints/ 文件夹中保存了 mobilenet_v3_small_model.pt ,有了这个模型,我们就可以进行Android的部署了。
2 源码分析
Clone 源码
我们先在本地clone一下github上的源码(吐槽一下git clone的速度,龟速!):
git clone https://github.com/pytorch/android-demo-app.git
然后便得到这个项目。
前提先确保一下Android安装好了SDK和NDK。
向 Gradle 添加依赖
然后我们会在 app 下的 build.gradle 中发现这样的依赖:
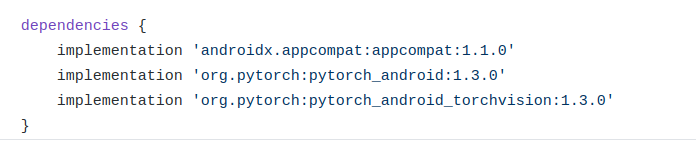
最下面两行中的
org.pytorch:pytorch_android: Pytorch Android API 的主要依赖,包含为4个Android abis (armeabi-v7a, arm64-v8a, x86, x86_64) 的 libtorch 本地库。org.pytorch:pytorch_android_torchvision:它是具有将 android.media.image 和 android.graphics.bitmap 转换为 Tensor 的附加库。
3 读取图片数据
在 MainActivity.java 文件中,有这么一行:
bitmap = BitmapFactory.decodeStream(getAssets().open("image.jpg"));
Bitmap 为位图,其包括像素以及长、宽、颜色等描述信息。长、宽、像素位数用来描述图片,并可以通过这些信息计算出图片的像素占用内存的大小。
通过 BitmapFactory.decodeStream( ) 这一函数加载图像。
4 读取模型
同样在 MainActivity.java文件中,有这么一行:
module = Module.load(assetFilePath(this, "model.pt"));
当然我们需要 import org.pytorch.Module
然后通过 Module 定义一个对象后使用 Module.load() 来读取模型。
5 将图像转换为Tensor

org.pytorch.torchvision.TensorImageUtils 就是org.pytorch:pytorch_android_torchvision库中的一部分,TensorImageUtils.bitmapToFloat32Tensor 创建一个Tensor类型。
inputTensor 的 大小为 1x3xHxW, 其中 H 和 W 分别为 Bitmap 的高和宽。
6 运行模型

将 inputTensor 放到模型中运行,通过 module.forward() 得到一个 outputTensor。
7 处理结果
    // getting tensor content as java array of floats
    final float[] scores = outputTensor.getDataAsFloatArray();

    // searching for the index with maximum score
    float maxScore = -Float.MAX_VALUE;
    int maxScoreIdx = -1;
    for (int i = 0; i < scores.length; i++) {
      if (scores[i] > maxScore) {
        maxScore = scores[i];
        maxScoreIdx = i;
      }
    }

    String className = ImageNetClasses.IMAGENET_CLASSES[maxScoreIdx];

    // showing className on UI
    TextView textView = findViewById(R.id.text);
    textView.setText(className);
判断最高分数,并将结果显示到textView中。
Demo2 Pytorch Demo APP
这是另一个Demo App,它可以进行图像分类和文字分类。而图像分类就需要利用摄像头。
1 摄像头API
摄像头API通过使用 org.pytorch.demo.vision.AbstractCameraXActivity 类。
在 AbstractCameraXActivity.java 中的具体源码如下:
  private void setupCameraX() {
    final TextureView textureView = getCameraPreviewTextureView();
    // 实现摄像头预览
    final PreviewConfig previewConfig = new PreviewConfig.Builder().build();
    final Preview preview = new Preview(previewConfig);
    preview.setOnPreviewOutputUpdateListener(output -> textureView.setSurfaceTexture(output.getSurfaceTexture()));

	// 实现数据分析并回调
    final ImageAnalysisConfig imageAnalysisConfig =
        new ImageAnalysisConfig.Builder()
            .setTargetResolution(new Size(224, 224))
            .setCallbackHandler(mBackgroundHandler)
            .setImageReaderMode(ImageAnalysis.ImageReaderMode.ACQUIRE_LATEST_IMAGE)
            .build();
    final ImageAnalysis imageAnalysis = new ImageAnalysis(imageAnalysisConfig);
    imageAnalysis.setAnalyzer(
        (image, rotationDegrees) -> {
          if (SystemClock.elapsedRealtime() - mLastAnalysisResultTime < 500) {
            return;
          }
          final R result = analyzeImage(image, rotationDegrees);
          if (result != null) {
            mLastAnalysisResultTime = SystemClock.elapsedRealtime();
            runOnUiThread(() -> applyToUiAnalyzeImageResult(result));
          }
        });

    CameraX.bindToLifecycle(this, preview, imageAnalysis);
  }
  // analyzeImage函数是用来处理摄像头输出
  void analyzeImage(android.media.Image, int rotationDegrees)
2 图像分类
而在 ImageClassificationActivity.java 中的源码如下:
protected AnalysisResult analyzeImage(ImageProxy image, int rotationDegrees) {
    if (mAnalyzeImageErrorState) {
      return null;
    }

    try {
      if (mModule == null) {
        final String moduleFileAbsoluteFilePath = new File(
            Utils.assetFilePath(this, getModuleAssetName())).getAbsolutePath();
        // 导入模型
        mModule = Module.load(moduleFileAbsoluteFilePath);

        mInputTensorBuffer =
            Tensor.allocateFloatBuffer(3 * INPUT_TENSOR_WIDTH * INPUT_TENSOR_HEIGHT);
        mInputTensor = Tensor.fromBlob(mInputTensorBuffer, new long[]{1, 3, INPUT_TENSOR_HEIGHT, INPUT_TENSOR_WIDTH});
      }

      final long startTime = SystemClock.elapsedRealtime();
      // 将以YUV420形式的Image类型转化为输入Tensor
      TensorImageUtils.imageYUV420CenterCropToFloatBuffer(
          image.getImage(), rotationDegrees,
          INPUT_TENSOR_WIDTH, INPUT_TENSOR_HEIGHT,
          TensorImageUtils.TORCHVISION_NORM_MEAN_RGB,
          TensorImageUtils.TORCHVISION_NORM_STD_RGB,
          mInputTensorBuffer, 0);

      final long moduleForwardStartTime = SystemClock.elapsedRealtime();
      // 利用模型进行运算
      final Tensor outputTensor = mModule.forward(IValue.from(mInputTensor)).toTensor();
      final long moduleForwardDuration = SystemClock.elapsedRealtime() - moduleForwardStartTime;

      // 从模型中得到预测分数
      final float[] scores = outputTensor.getDataAsFloatArray();
      // 找到得分最高的前k个类
      final int[] ixs = Utils.topK(scores, TOP_K);
      final String[] topKClassNames = new String[TOP_K];
      final float[] topKScores = new float[TOP_K];
      for (int i = 0; i < TOP_K; i++) {
        final int ix = ixs[i];
        topKClassNames[i] = Constants.IMAGENET_CLASSES[ix];
        topKScores[i] = scores[ix];
      }
      final long analysisDuration = SystemClock.elapsedRealtime() - startTime;
      return new AnalysisResult(topKClassNames, topKScores, moduleForwardDuration, analysisDuration);
    } catch (Exception e) {
      Log.e(Constants.TAG, "Error during image analysis", e);
      mAnalyzeImageErrorState = true;
      runOnUiThread(() -> {
        if (!isFinishing()) {
          showErrorDialog(v -> ImageClassificationActivity.this.finish());
        }
      });
      return null;
    }
  }
3 显示结果
最后将得到的前k个类加载到UI上。
protected void applyToUiAnalyzeImageResult(AnalysisResult result) {
    mMovingAvgSum += result.moduleForwardDuration;
    mMovingAvgQueue.add(result.moduleForwardDuration);
    if (mMovingAvgQueue.size() > MOVING_AVG_PERIOD) {
      mMovingAvgSum -= mMovingAvgQueue.remove();
    }

    for (int i = 0; i < TOP_K; i++) {
      final ResultRowView rowView = mResultRowViews[i];
      rowView.nameTextView.setText(result.topNClassNames[i]);
      rowView.scoreTextView.setText(String.format(Locale.US, SCORES_FORMAT,
          result.topNScores[i]));
      rowView.setProgressState(false);
    }

    mMsText.setText(String.format(Locale.US, FORMAT_MS, result.moduleForwardDuration));
    if (mMsText.getVisibility() != View.VISIBLE) {
      mMsText.setVisibility(View.VISIBLE);
    }
    mFpsText.setText(String.format(Locale.US, FORMAT_FPS, (1000.f / result.analysisDuration)));
    if (mFpsText.getVisibility() != View.VISIBLE) {
      mFpsText.setVisibility(View.VISIBLE);
    }

    if (mMovingAvgQueue.size() == MOVING_AVG_PERIOD) {
      float avgMs = (float) mMovingAvgSum / MOVING_AVG_PERIOD;
      mMsAvgText.setText(String.format(Locale.US, FORMAT_AVG_MS, avgMs));
      if (mMsAvgText.getVisibility() != View.VISIBLE) {
        mMsAvgText.setVisibility(View.VISIBLE);
      }
    }
 }
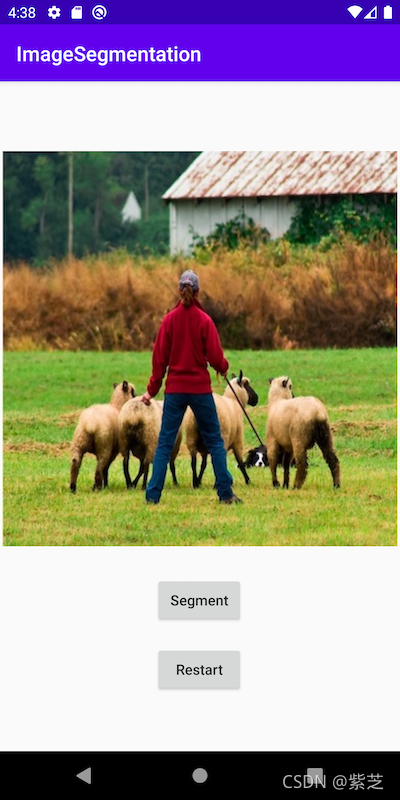
Demo3 Image Segmentation
Semantic Image Segmentation DeepLabV3 with Mobile Interpreter on Android
This repo offers a Python script that converts the PyTorch DeepLabV3 model to the Lite Interpreter version of model, also optimized for mobile, and an Android app that uses the model to segment images.
1.Prepare the Model
import torch
from torch.utils.mobile_optimizer import optimize_for_mobile

# 加载训练好的模型
model = torch.hub.load('pytorch/vision:v0.9.0', 'deeplabv3_resnet50', pretrained=True)
# 设置为推理模式
model.eval()

# 将训练好的模型转换为jit脚本模型
scripted_module = torch.jit.script(model)
# 优化jit脚本模型,提高在移动设备上的推理性能
optimized_scripted_module = optimize_for_mobile(scripted_module)

# 导出完整的jit版本模型(不兼容轻量化解释器)
scripted_module.save("deeplabv3_scripted.pt")
# 导出轻量化解释器版本模型(与轻量化解释器兼容)
scripted_module._save_for_lite_interpreter("deeplabv3_scripted.ptl")
# 使用优化的轻量化解释器模型比未优化的轻量化解释器模型推理速度快60%左右,比未优化的jit脚本模型推理速度快6%左右
optimized_scripted_module._save_for_lite_interpreter("deeplabv3_scripted_optimized.ptl")
2.Use Android Studio
使用Android Studio打开ImageSegment项目。注意应用程序的build.gradle文件有以下行:
implementation 'org.pytorch:pytorch_android_lite:1.9.0'
implementation 'org.pytorch:pytorch_android_torchvision:1.9.0'
在MainActive . java中,下面的代码用于加载模型:
mModule = LiteModuleLoader.load(MainActivity.assetFilePath(getApplicationContext(), "deeplabv3_scripted_optimized.ptl"));
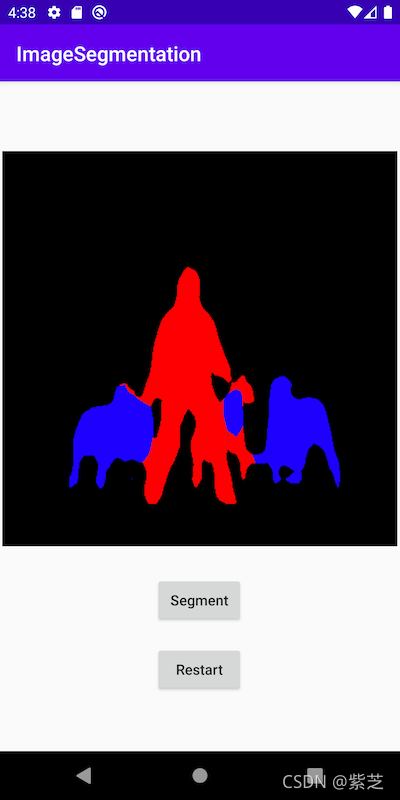
3.Run the app
参考文献
- https://blog.csdn.net/karry_zzj/article/details/102827337

GitCode 天启AI是一款由 GitCode 团队打造的智能助手,基于先进的LLM(大语言模型)与多智能体 Agent 技术构建,致力于为用户提供高效、智能、多模态的创作与开发支持。它不仅支持自然语言对话,还具备处理文件、生成 PPT、撰写分析报告、开发 Web 应用等多项能力,真正做到“一句话,让 Al帮你完成复杂任务”。
更多推荐


 25
25 0
0- 0


 已为社区贡献2条内容

所有评论(0)