
java搭建简单web服务器用于WiFi模块发送指令
目的:通过和WiFi模块连接同一手机热点,使用相同端口,用于给小车搭载的WiFi模块发送指令。准备:电脑安装eclipse,使用java Socket编程简单总结了一下写一个简单地服务器需要哪些步骤:1.首先肯定要借助ServerSocket和Socket这两个类。2.ServerSocket类指定服务器接口。3.ServerSocket调用accept()方法生成一个Socket对象,Socke
目的:通过和WiFi模块连接同一手机热点,使用相同端口,用于给小车搭载的WiFi模块发送指令。
准备:电脑安装eclipse,使用java Socket编程
简单总结了一下写一个简单地服务器需要哪些步骤:
1.首先肯定要借助ServerSocket和Socket这两个类。
2.ServerSocket类指定服务器接口。
3.ServerSocket调用accept()方法生成一个Socket对象,Socket对象调用getInputStream()获得浏览器发来的Http请求的基本信息。
4.服务器解析Http请求的基本信息,从中取出浏览器想要访问的资源的具体位置。
代码如下:
import javax.swing.JFrame;
import java.io.DataOutputStream;
import java.io.IOException;
import java.net.ServerSocket;
import java.net.Socket;
public class MainUI extends JFrame{
private PaintUI jp=new PaintUI();
public static final int PORT = 12444;
public static void main(String[] args) {
MainUI ui=new MainUI();
ui.showui() ;
try {
Thread.sleep(30000);
} catch (InterruptedException e) {
// TODO Auto-generated catch block
e.printStackTrace();
}
ui.ServerSocketTest();
}
public void ServerSocketTest() {
System.out.println(jp.getT1().getWhichroad());
try {
ServerSocket serverSocket=new ServerSocket(PORT);
System.out.println("服务器以启动等待客户端连接...");
Socket Client = serverSocket.accept();
System.out.println("Socket client" + Client.getRemoteSocketAddress() + "成功连接");
DataOutputStream out = new DataOutputStream(Client.getOutputStream());
System.out.println("向WiFi模块发送数据");
String s1 ="SNA";//前进
String s2 ="SNB";//后退
String s3 ="SNC";//左转
String s4 ="SND";//右转
String s5 ="SNF";//停止
switch(jp.getT1().getWhichroad()) {
case 1:
out.writeUTF(s1);//1,3
try {
Thread.sleep(4000);
} catch (InterruptedException e1) {
// TODO Auto-generated catch block
e1.printStackTrace();
}
out.writeUTF(s5);
try {
Thread.sleep(500);
} catch (InterruptedException e1) {
// TODO Auto-generated catch block
e1.printStackTrace();
}
out.writeUTF(s3);try {Thread.sleep(300);} catch (InterruptedException e1) {e1.printStackTrace();}
out.writeUTF(s1);//7
try {
Thread.sleep(2000);
} catch (InterruptedException e1) {
// TODO Auto-generated catch block
e1.printStackTrace();
}
out.writeUTF(s5);
try {
Thread.sleep(500);
} catch (InterruptedException e1) {
// TODO Auto-generated catch block
e1.printStackTrace();
}
out.writeUTF(s4);try {Thread.sleep(300);} catch (InterruptedException e1) {e1.printStackTrace();}//7
out.writeUTF(s1);//13
try {
Thread.sleep(2000);
} catch (InterruptedException e1) {
// TODO Auto-generated catch block
e1.printStackTrace();
}
out.writeUTF(s5);
try {
Thread.sleep(500);
} catch (InterruptedException e1) {
// TODO Auto-generated catch block
e1.printStackTrace();
}
out.writeUTF(s3);try {Thread.sleep(300);} catch (InterruptedException e1) {e1.printStackTrace();}//7
out.writeUTF(s1);//16
try {
Thread.sleep(2000);
} catch (InterruptedException e1) {
// TODO Auto-generated catch block
e1.printStackTrace();
}
out.writeUTF(s5);
break;
case 2:...........
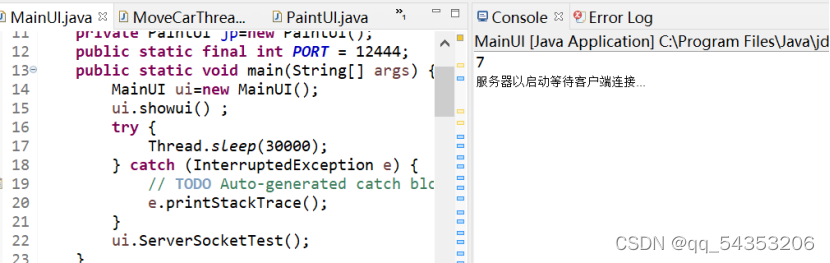
运行截图:

GitCode 天启AI是一款由 GitCode 团队打造的智能助手,基于先进的LLM(大语言模型)与多智能体 Agent 技术构建,致力于为用户提供高效、智能、多模态的创作与开发支持。它不仅支持自然语言对话,还具备处理文件、生成 PPT、撰写分析报告、开发 Web 应用等多项能力,真正做到“一句话,让 Al帮你完成复杂任务”。
更多推荐


 0
0 0
0- 0


 已为社区贡献1条内容

所有评论(0)